
 English
支援 – 管理系統 (Win)
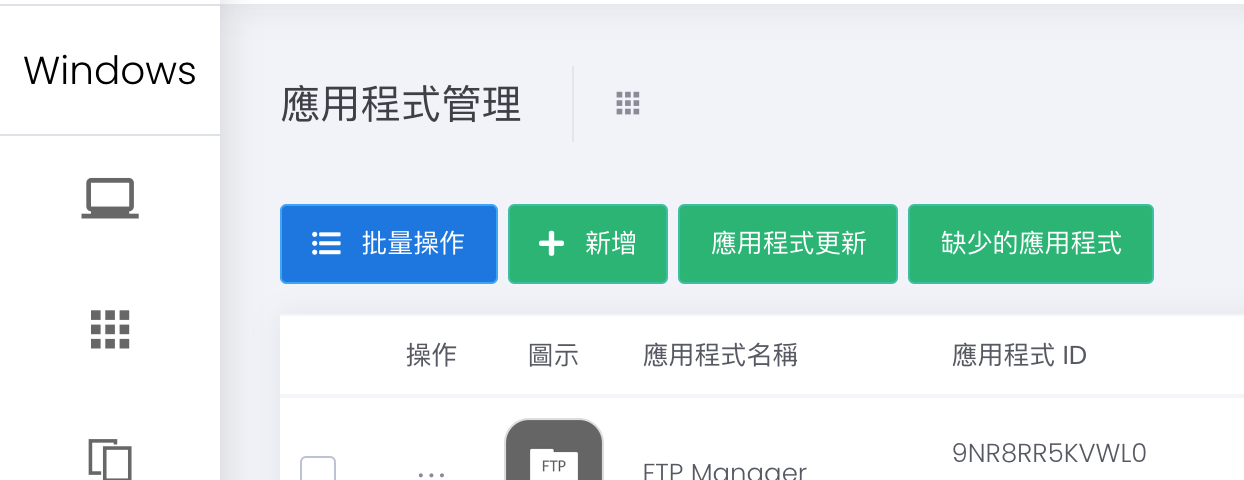
應用程式管理
應用程式管理 (Win)
有兩種方法可以為遠程安裝添加應用程式:
 如果應用程式未在 Windows 商店應用程式中列出,您可以考慮以下方法:
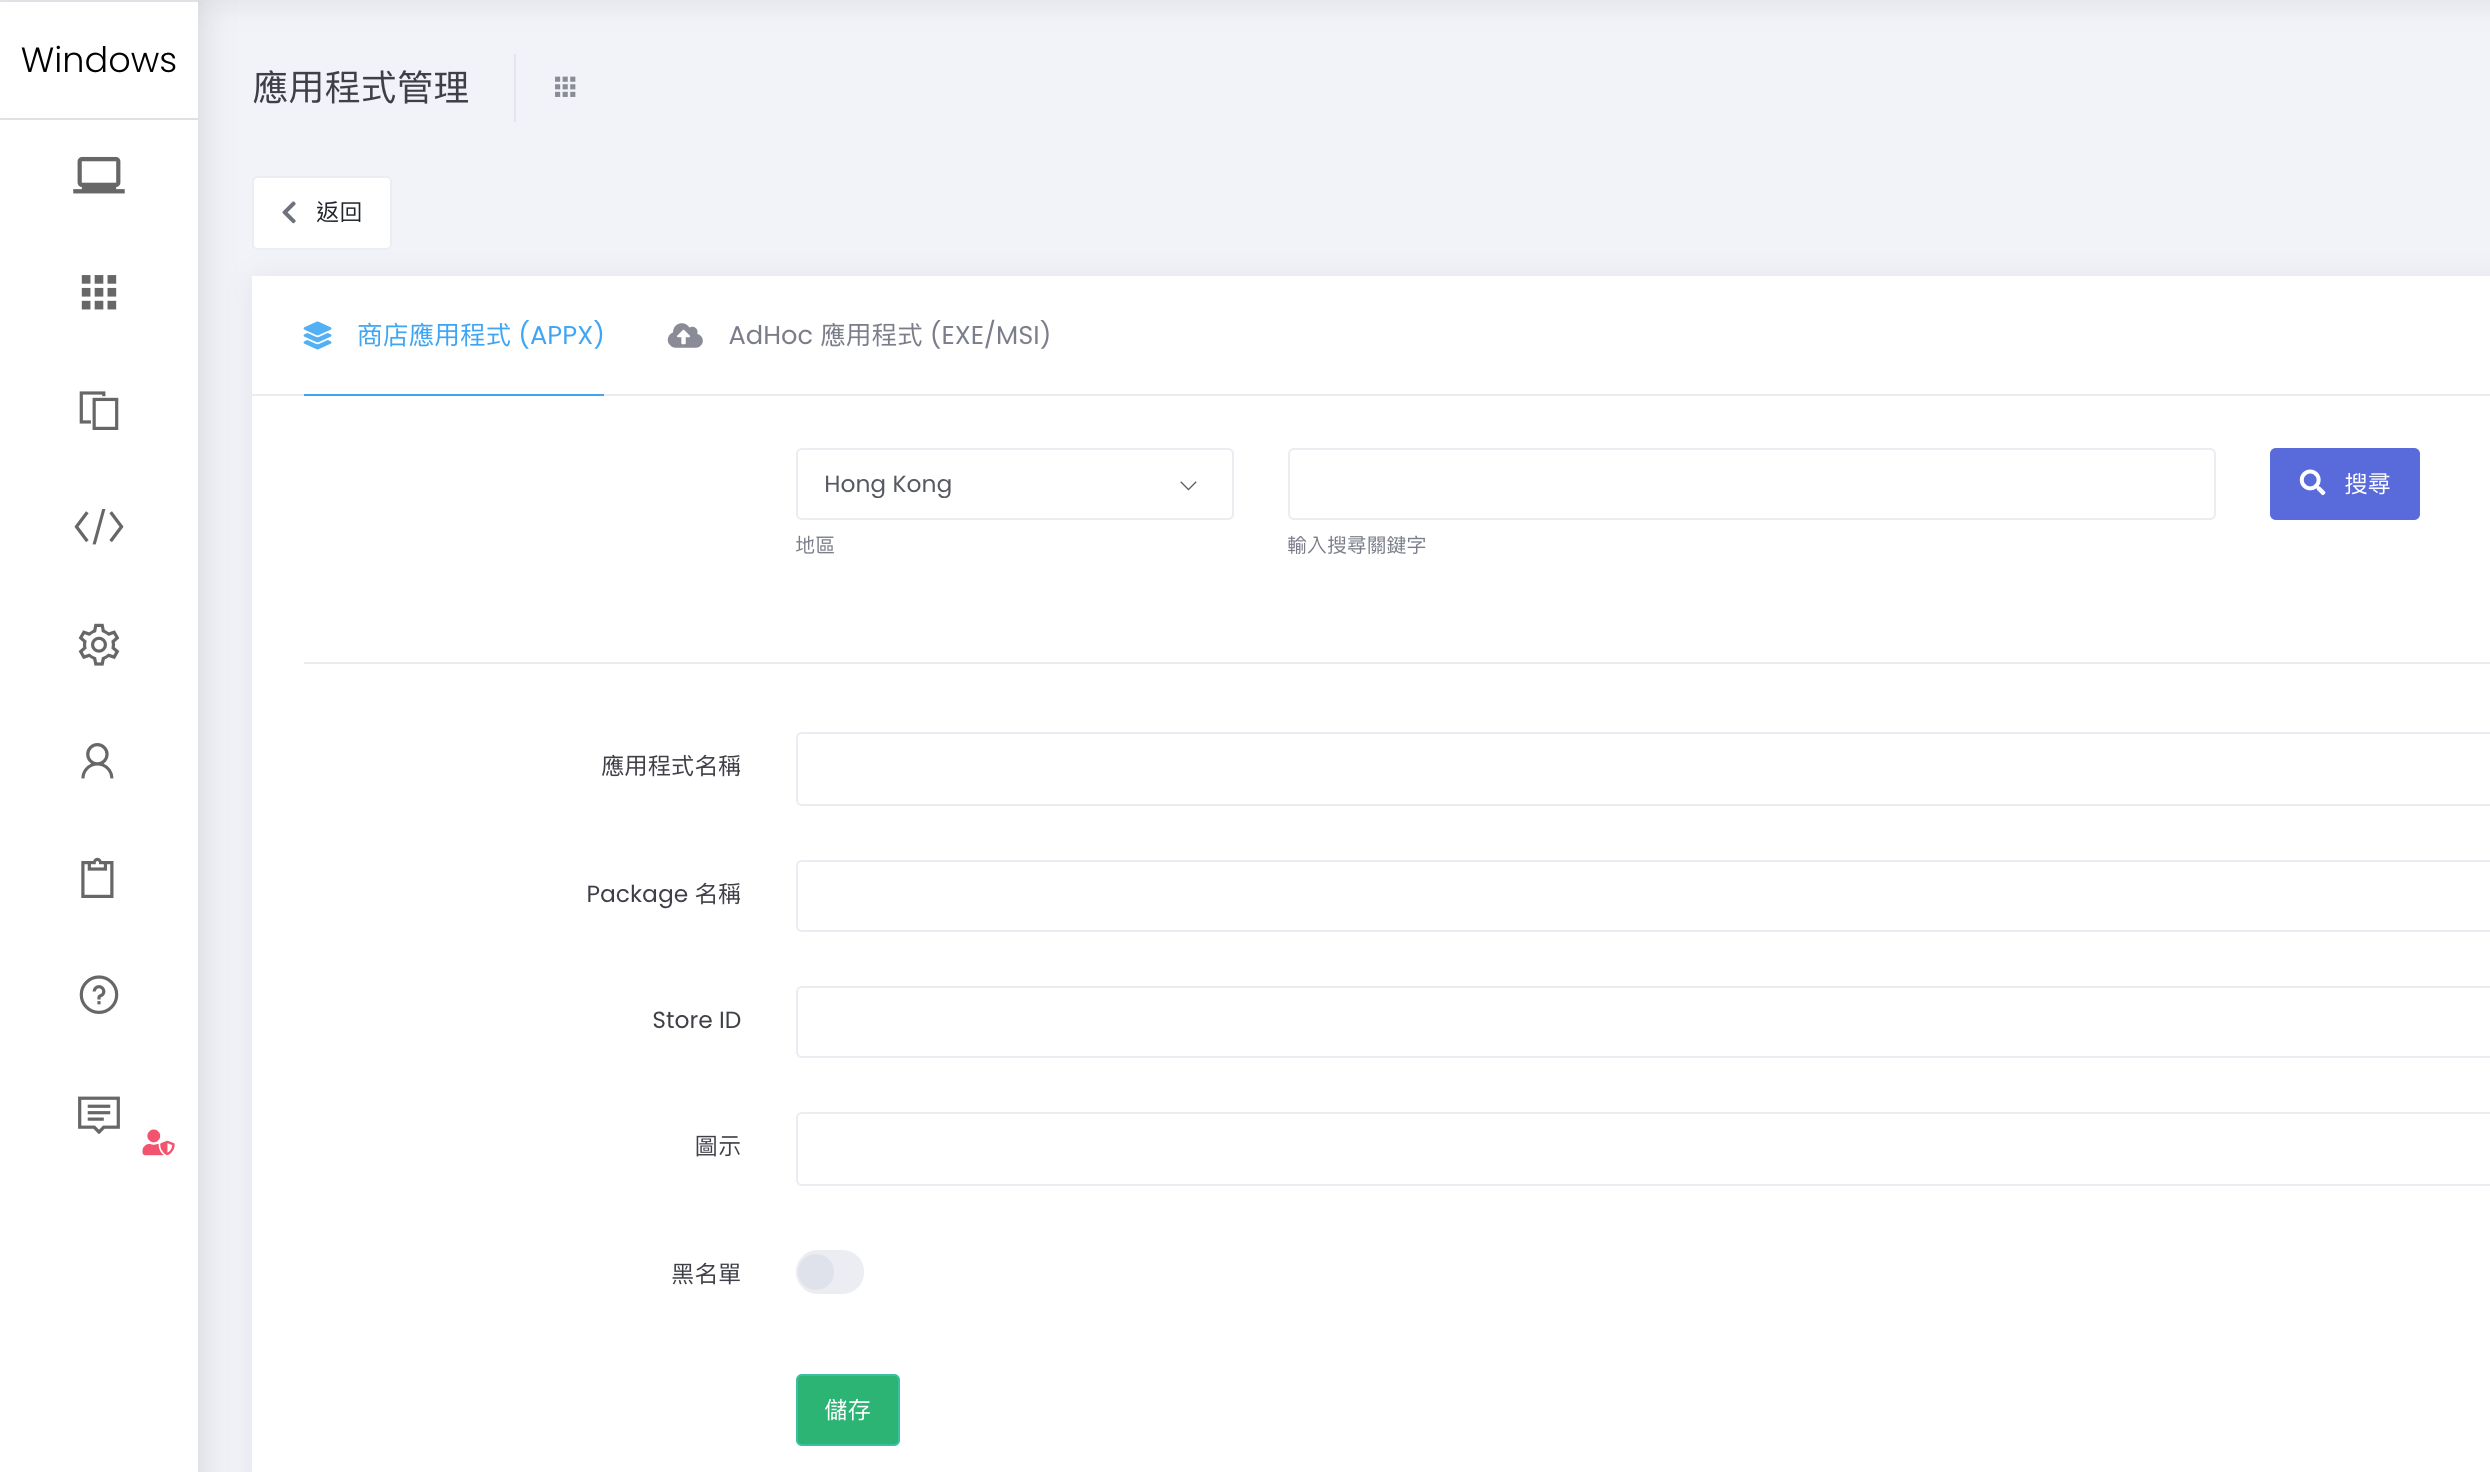
1) Windows 商店
- 「 應用程式 」 > 「 應用程式 」 > 「 應用程式管理 」> 「 + 新增 」> 「 商店應用程式 (APPX) 」
- 搜索您要添加的應用程式。
- 選擇應用程序並關閉彈出窗口。
- 應用程式的資料將會自動填上。
- 點擊「 儲存 」並確認。
 如果應用程式未在 Windows 商店應用程式中列出,您可以考慮以下方法:
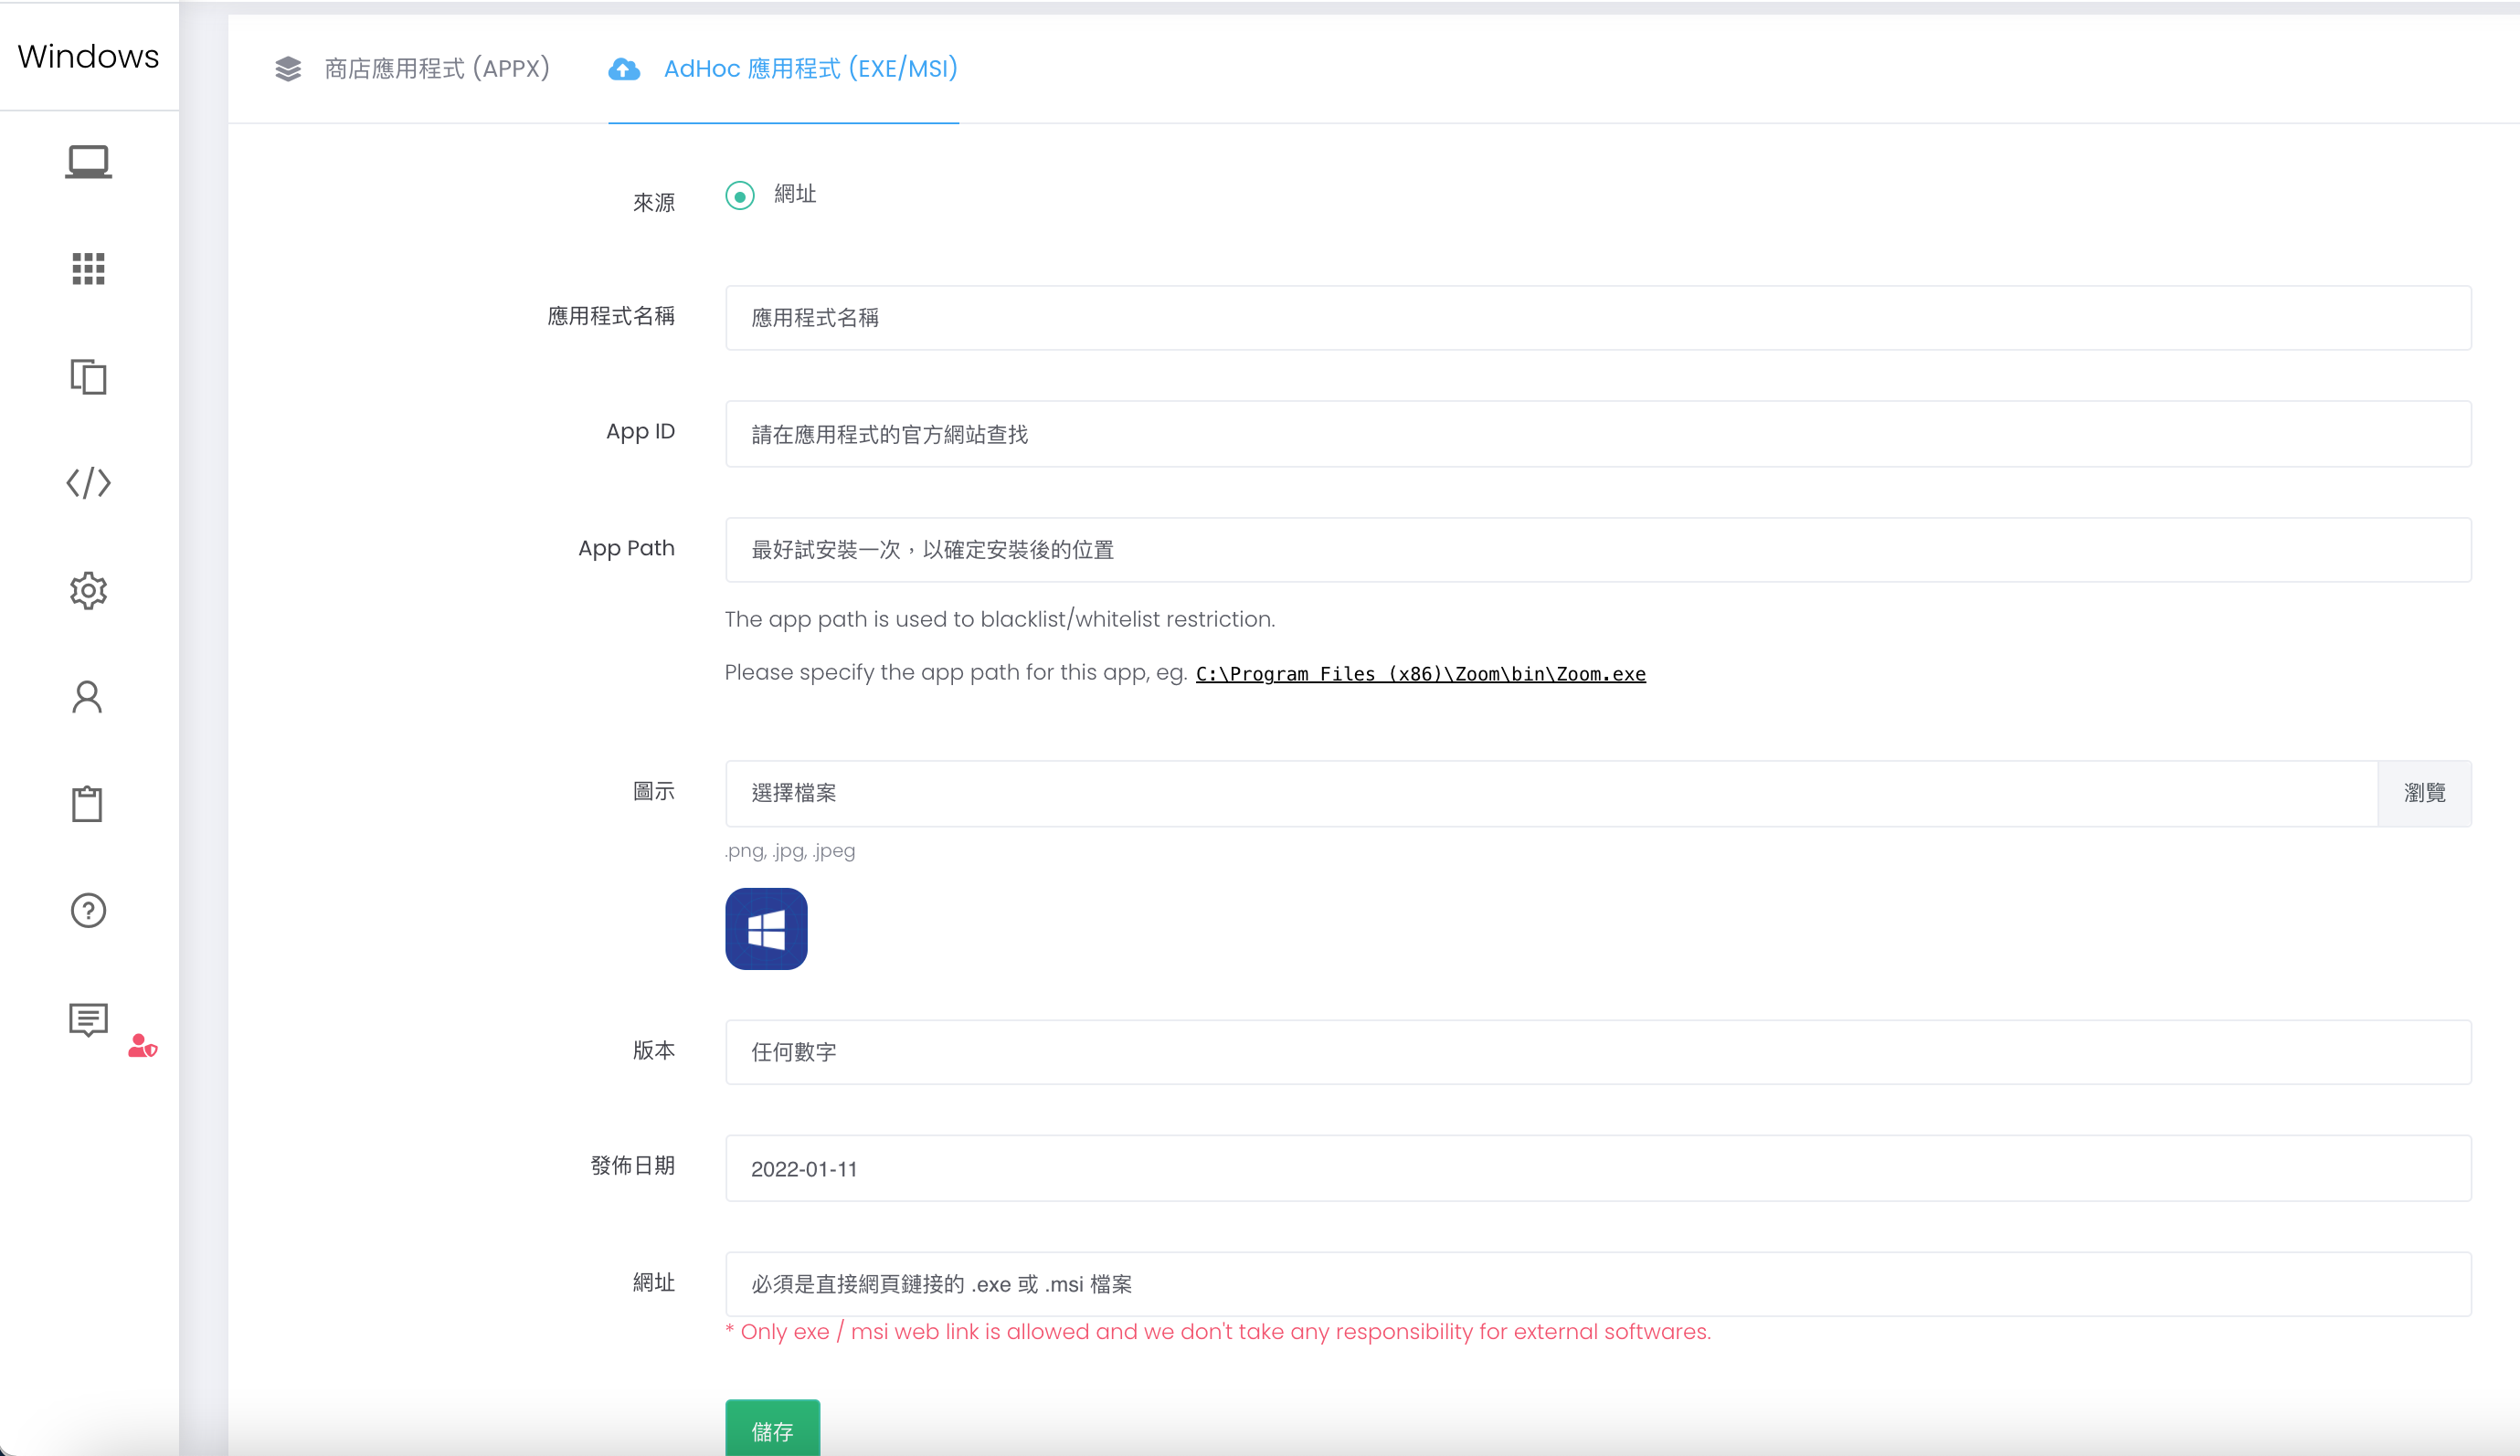
2) Ad Hoc .exe/.msi 文件
- 「 應用程式 」 > 「 應用程式 」 > 「 應用程式管理 」> 「 + 新增 」> 「 AdHoc 應用程序 (EXE/MSI) 」
- 填寫表格。請注意: a. 搜索.exe/.msi文件:用谷歌搜索應用程式的安裝文檔,強烈推薦從官網獲取源碼。 b. App ID:詳情請參考官網。 c. 應用路徑: 獲取準確的安裝路徑是很重要。強烈建議安裝一次,並檢查並確認路徑。 d. 版本:任何數字。 e. URL:請提供 .exe/.msi 文件的有效路徑。請注意,ESP 不對任何外部軟件負責。
Windows 上 ESP Student 的最新版本是 1.1.174
您可以設置排程表來啟動 / 解除黑屏。 只需在排程表的「額外步驟」中選取「啟動黑屏」/「解除黑屏」。
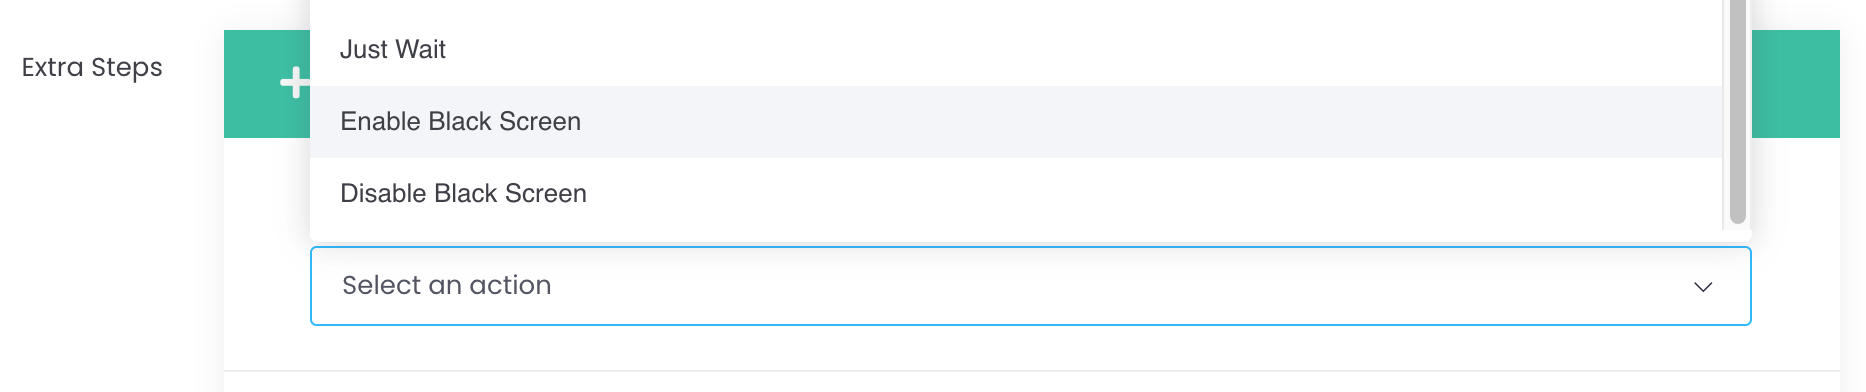
應用:對於BYOD學生,您可以考慮將此功能用作夜間睡眠模式。
注意:由於透過「單一應用程式鎖定」的方式去運作,所以期間需要一直開啟 ESP (Student),有一定的耗電量。 如需長時間開啓,建議最好接駁電源去運行排程表的黑屏。