
 繁體中文
繁體中文Support – Admin Console (Win)
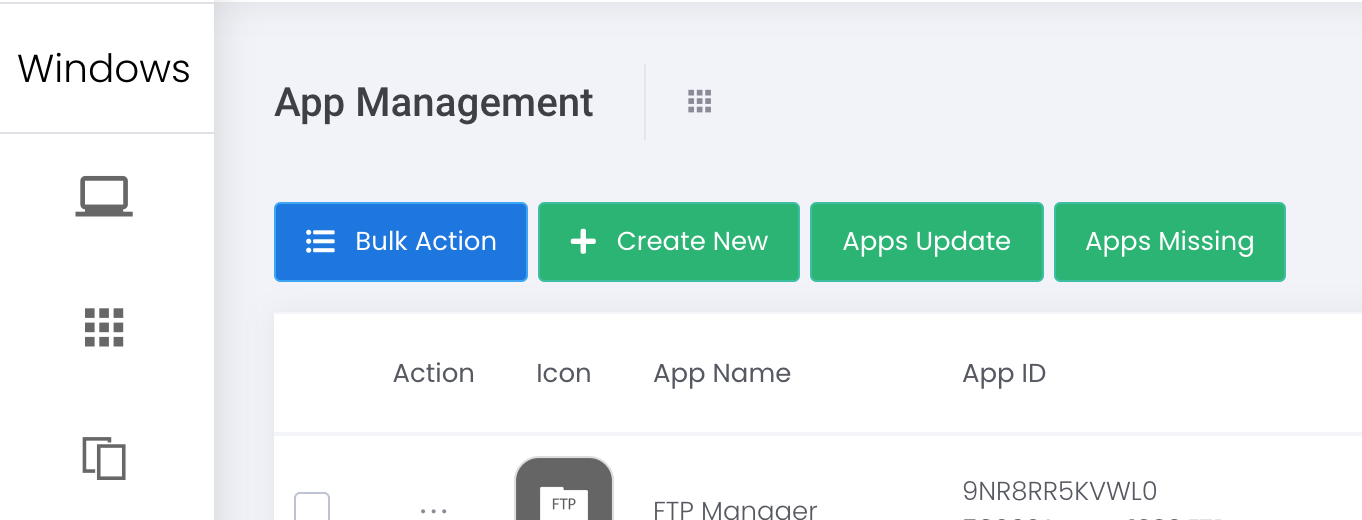
App Management
App Management (Win)
1) Windows Store
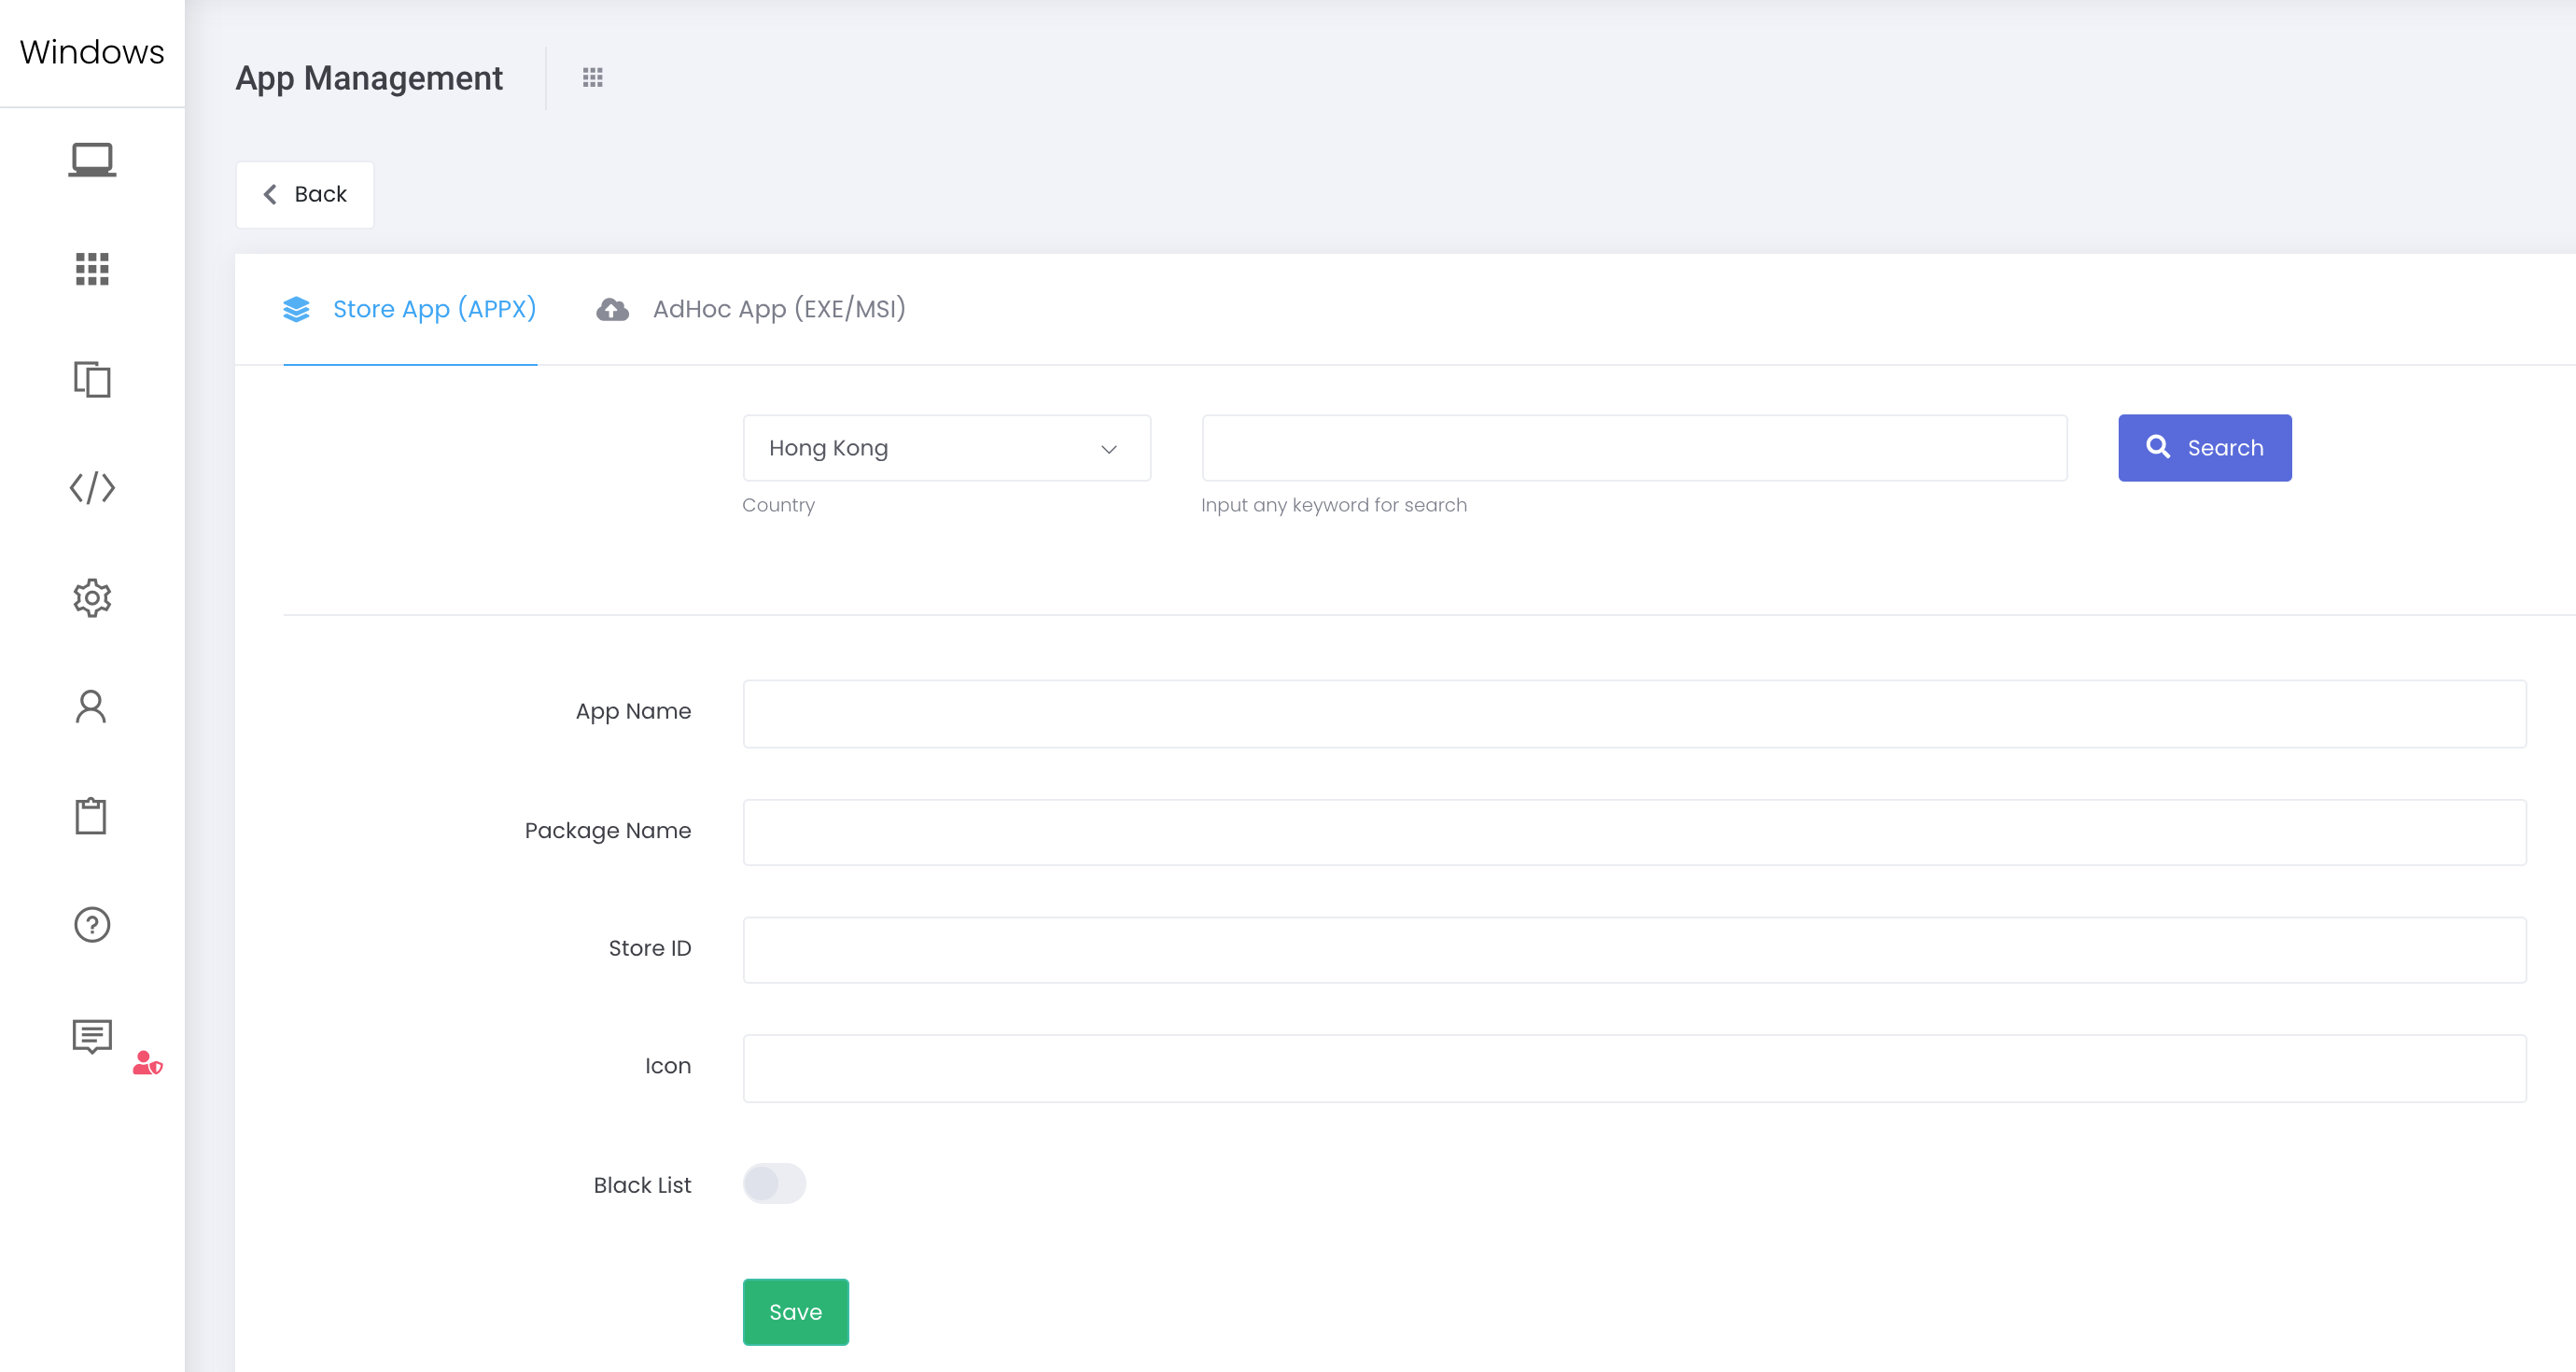
- Apps > Apps > App Management > + Create New > Store App (APPX)
- Search for the apps which you want to add.
- Select the app and Close the popup window.
- App information will be filled automatically.
- Check and confirm by clicking Save button.
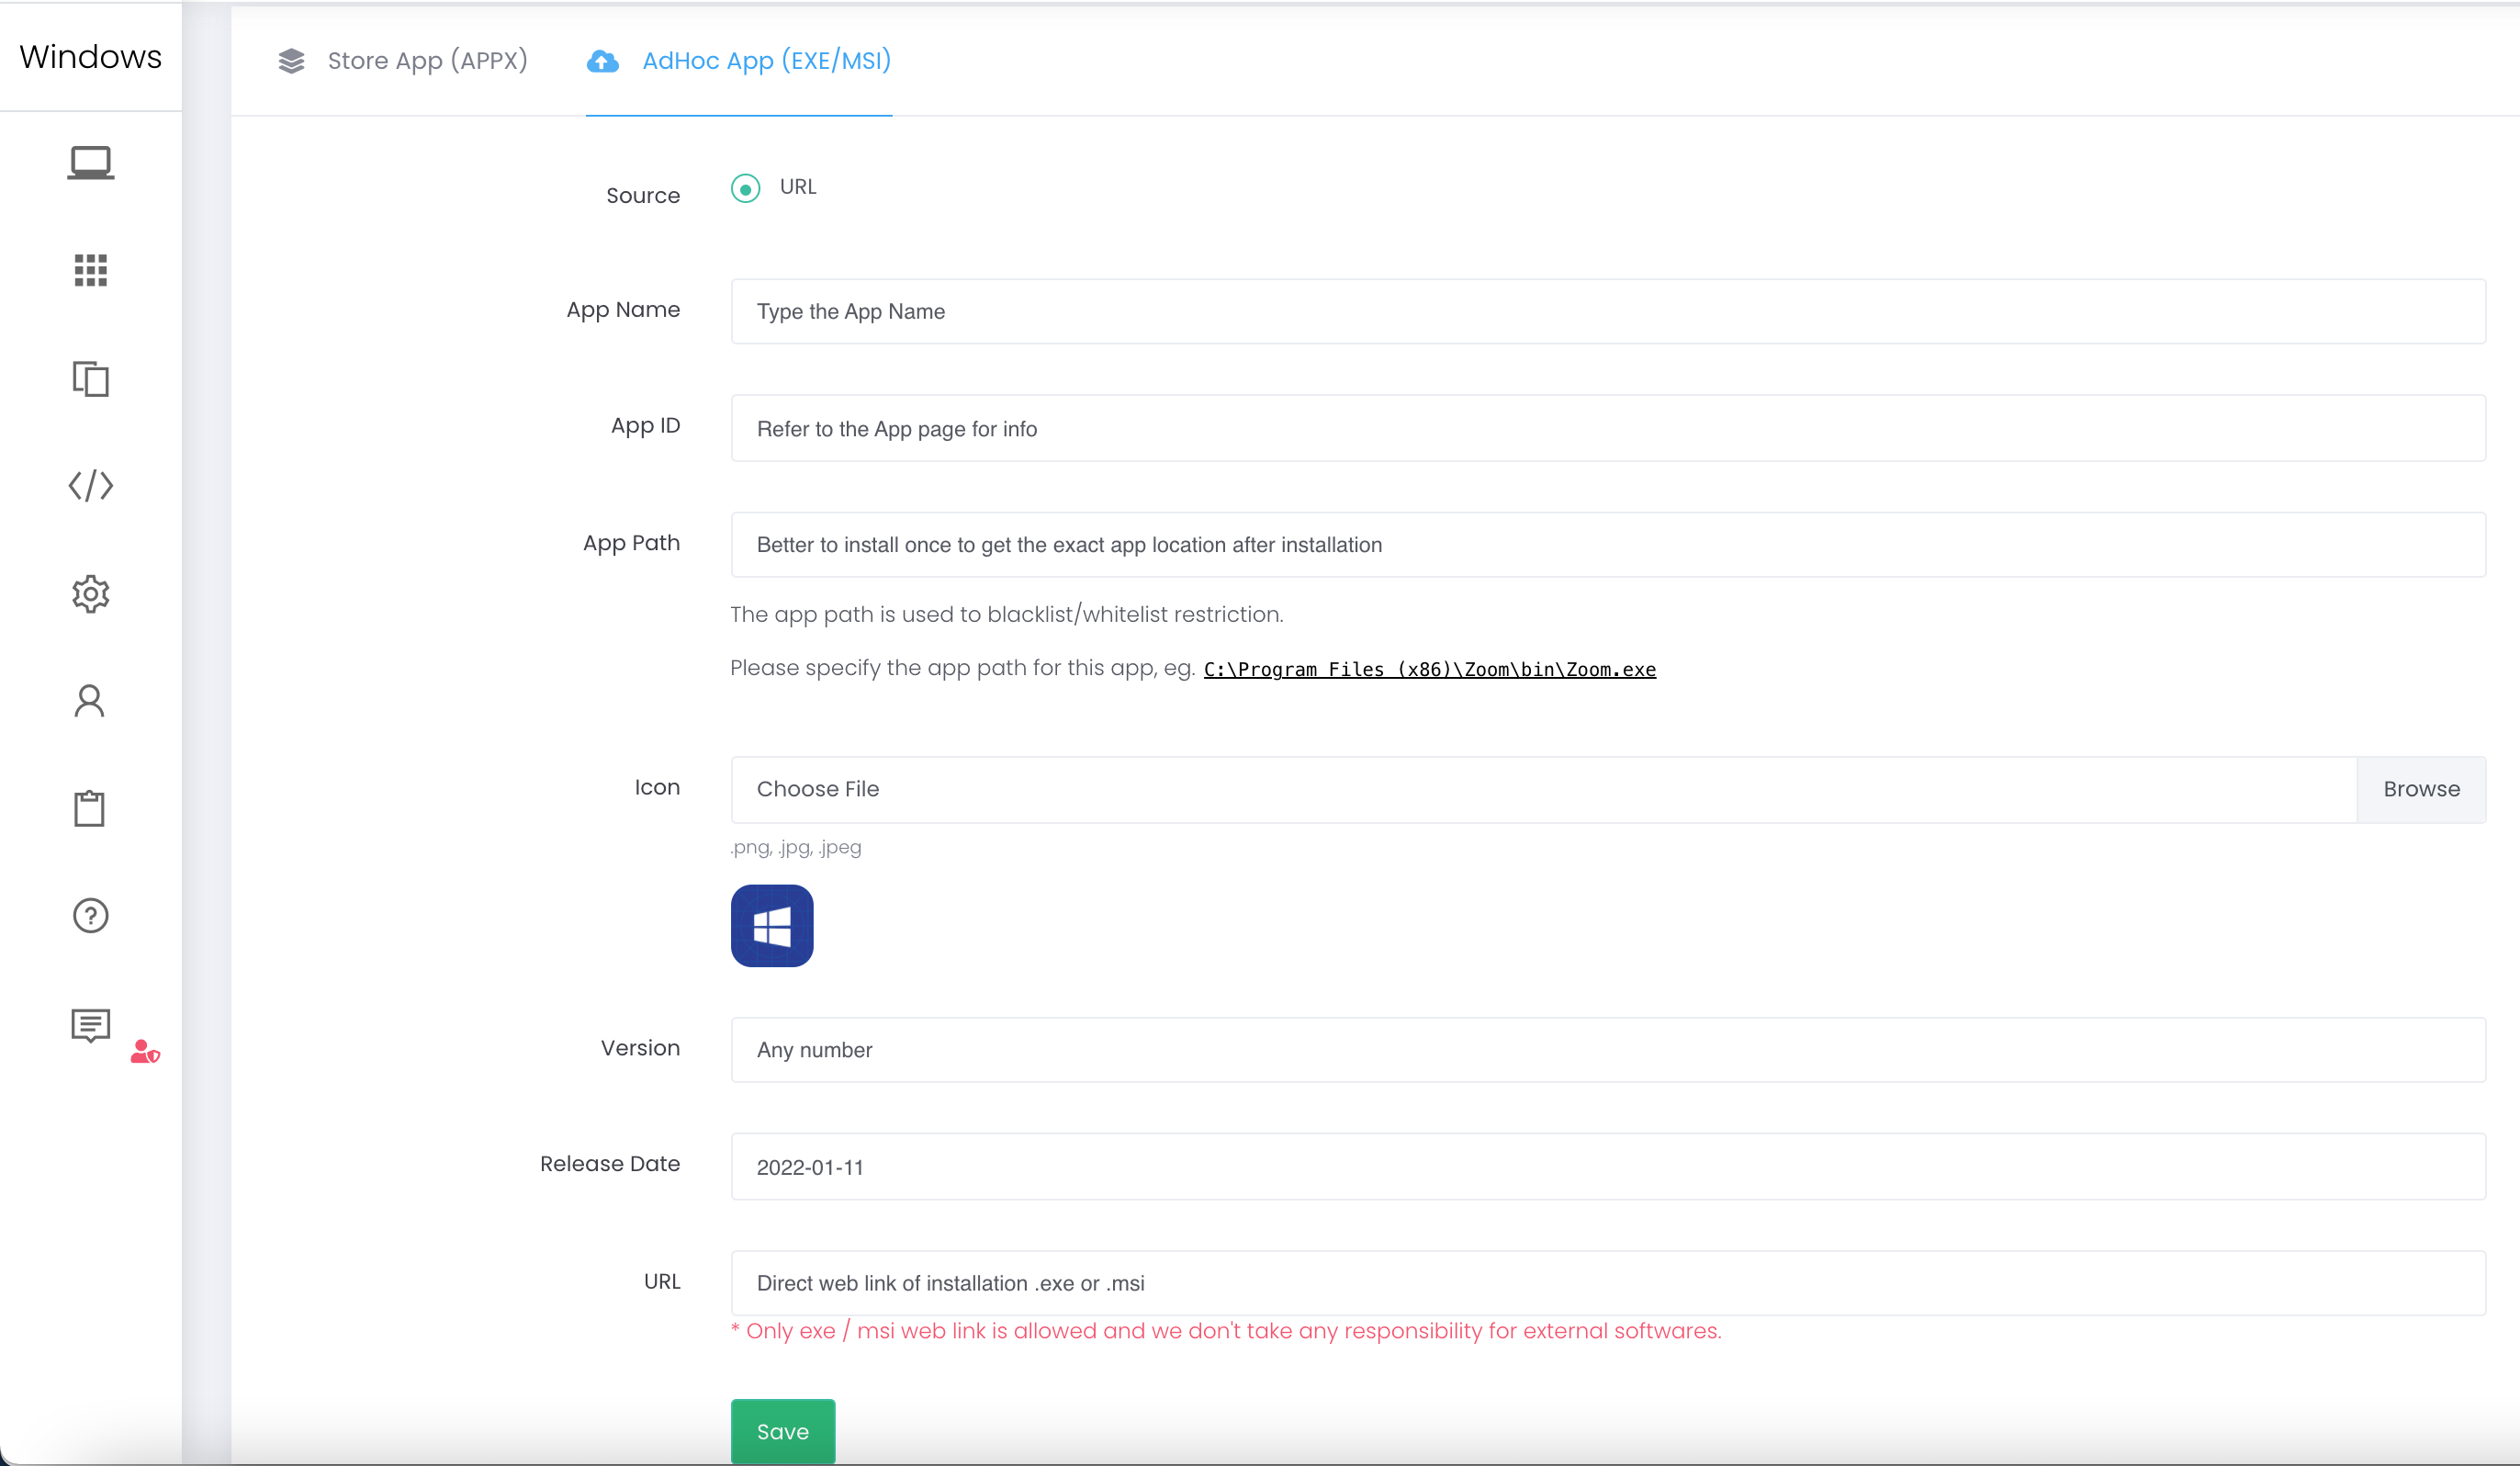
 If the app is not listed in Windows Store, you may consider the following approach:
2) Ad Hoc .exe/.msi file
- Apps > Apps > App Management > + Create New > AdHoc App (EXE/MSI)
- Fill in the form. Please note:
a. Search .exe/.msi file: Google search for the app installation file, highly recommend to obtain from the official website for the source. b. App ID: Please refer to the official website for details. c. App Path: It is important to obtain the exact path for installation. Highly recommend to install once, and check and confirm the path. d. Version: Any numerics. e. URL: Please provide valid path for .exe/.msi file. Please note that ESP is not responsible for any external softwares.
 3. Click Save to proceed.
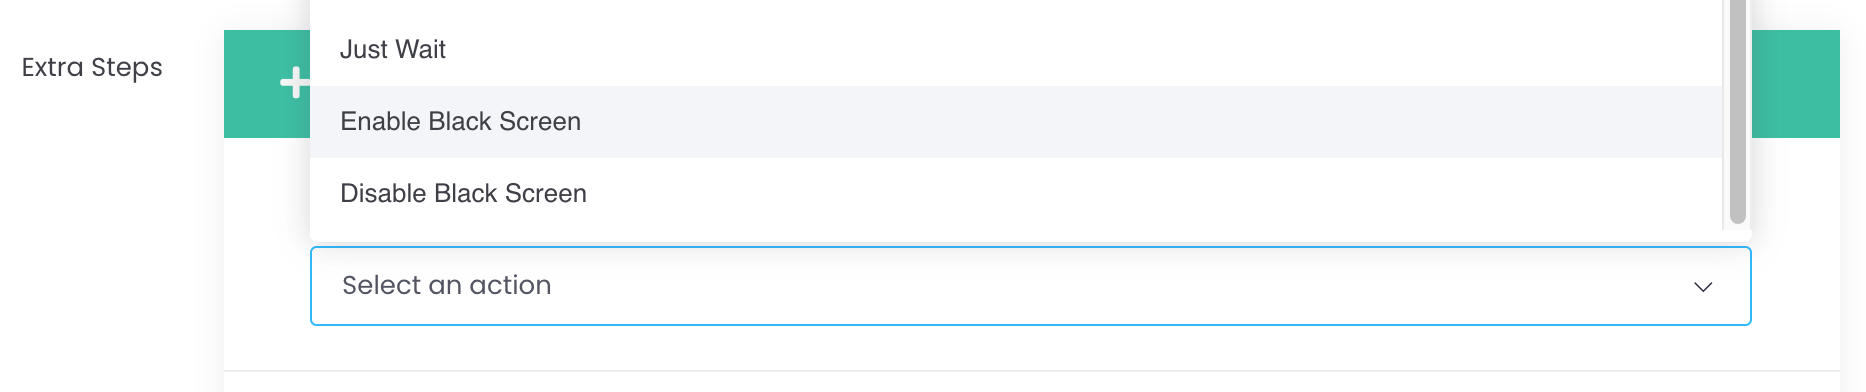
You can now set a schedule to enable and disable BlackScreen. Simply find the optional “Enable Black Screen” and “Disable Black Screen” in Extra Step in Schedule.
Application:You may consider using this feature as Sleeping mode at night time for BYOD students.
Note:This feature is similar to Single App Lock to ESP (Student), thus involve battery consumption. Recommend connecting to power source while in use of Blackscreen with Schedule.