
 繁體中文
繁體中文Support – Admin Console (iOS)
App Management
App Management (iOS)
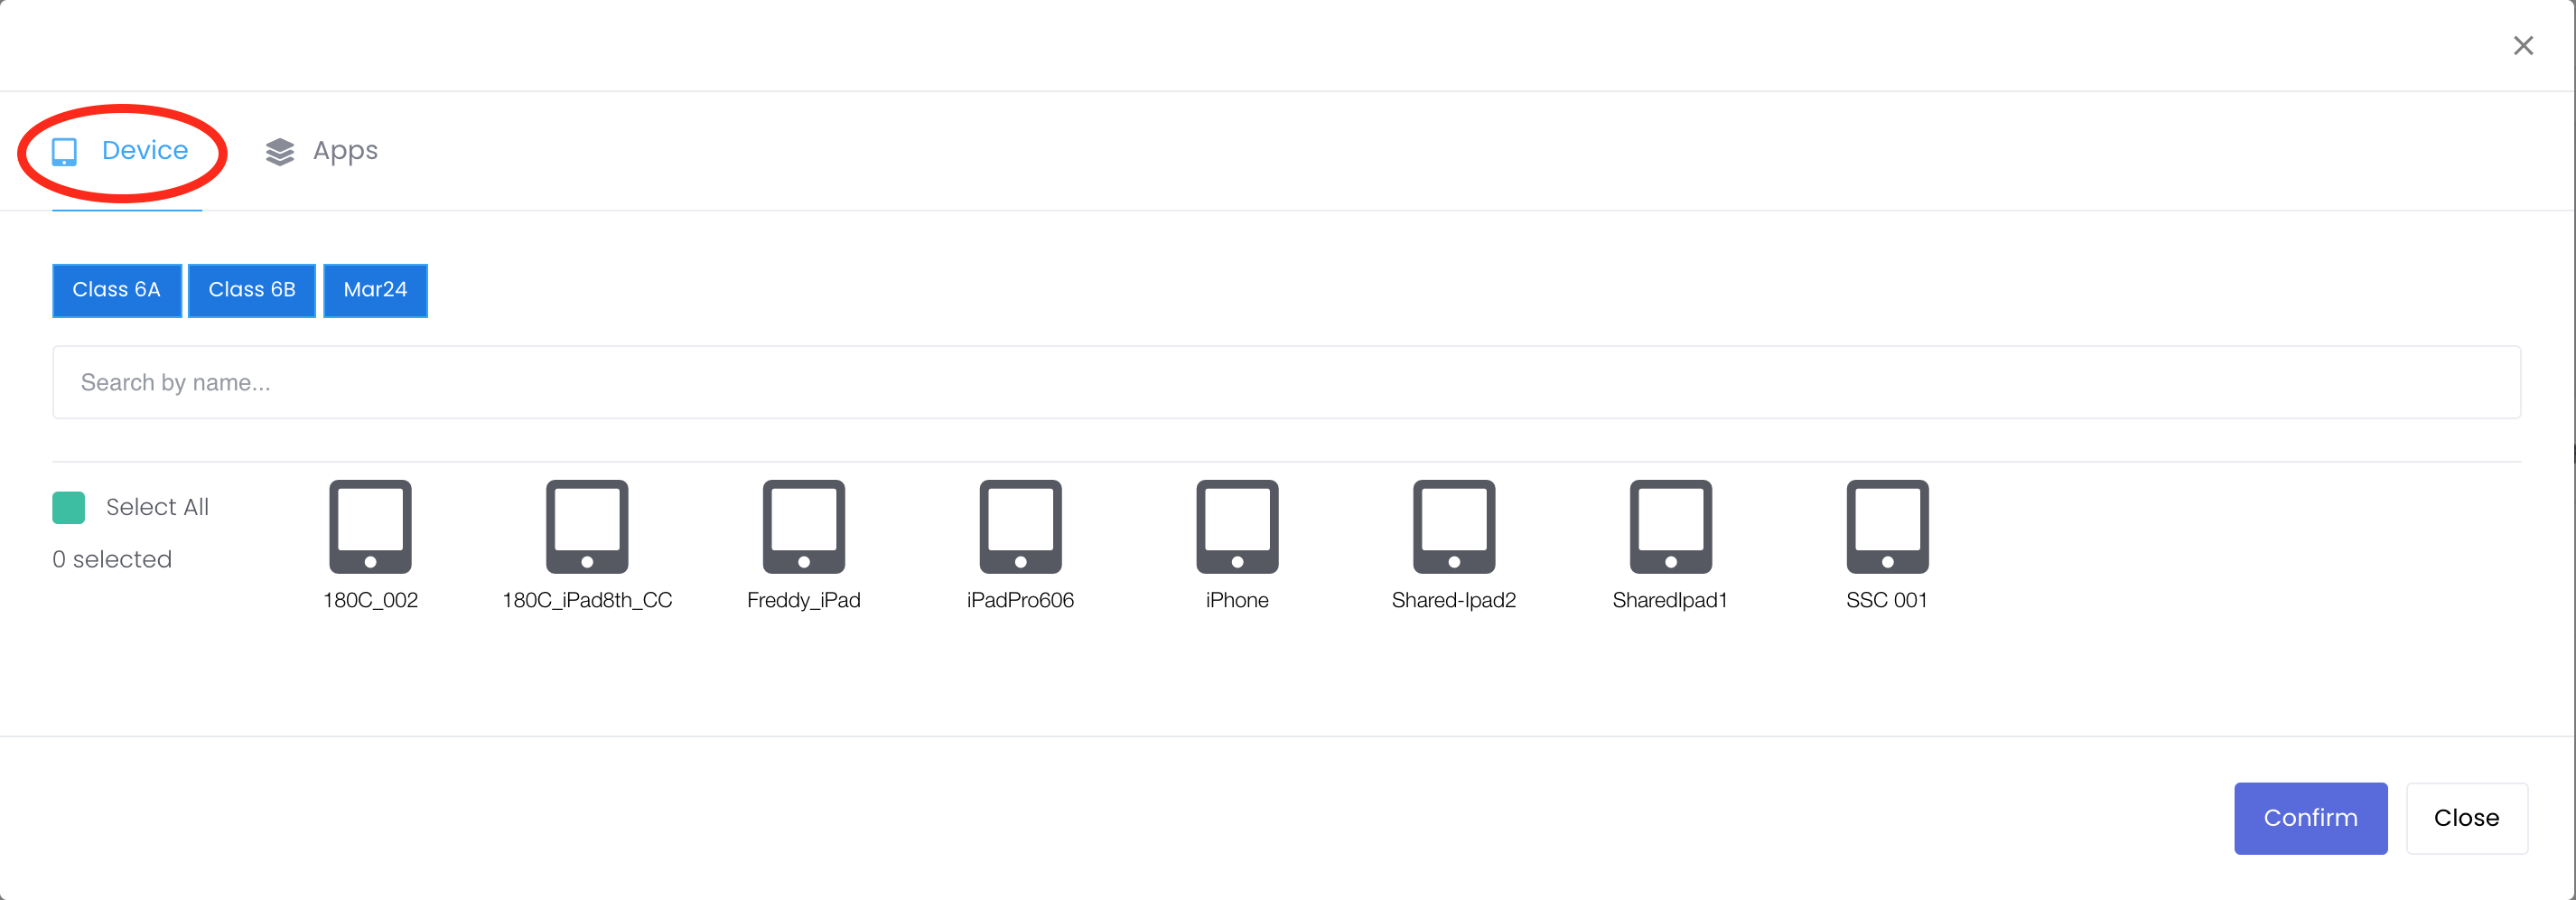
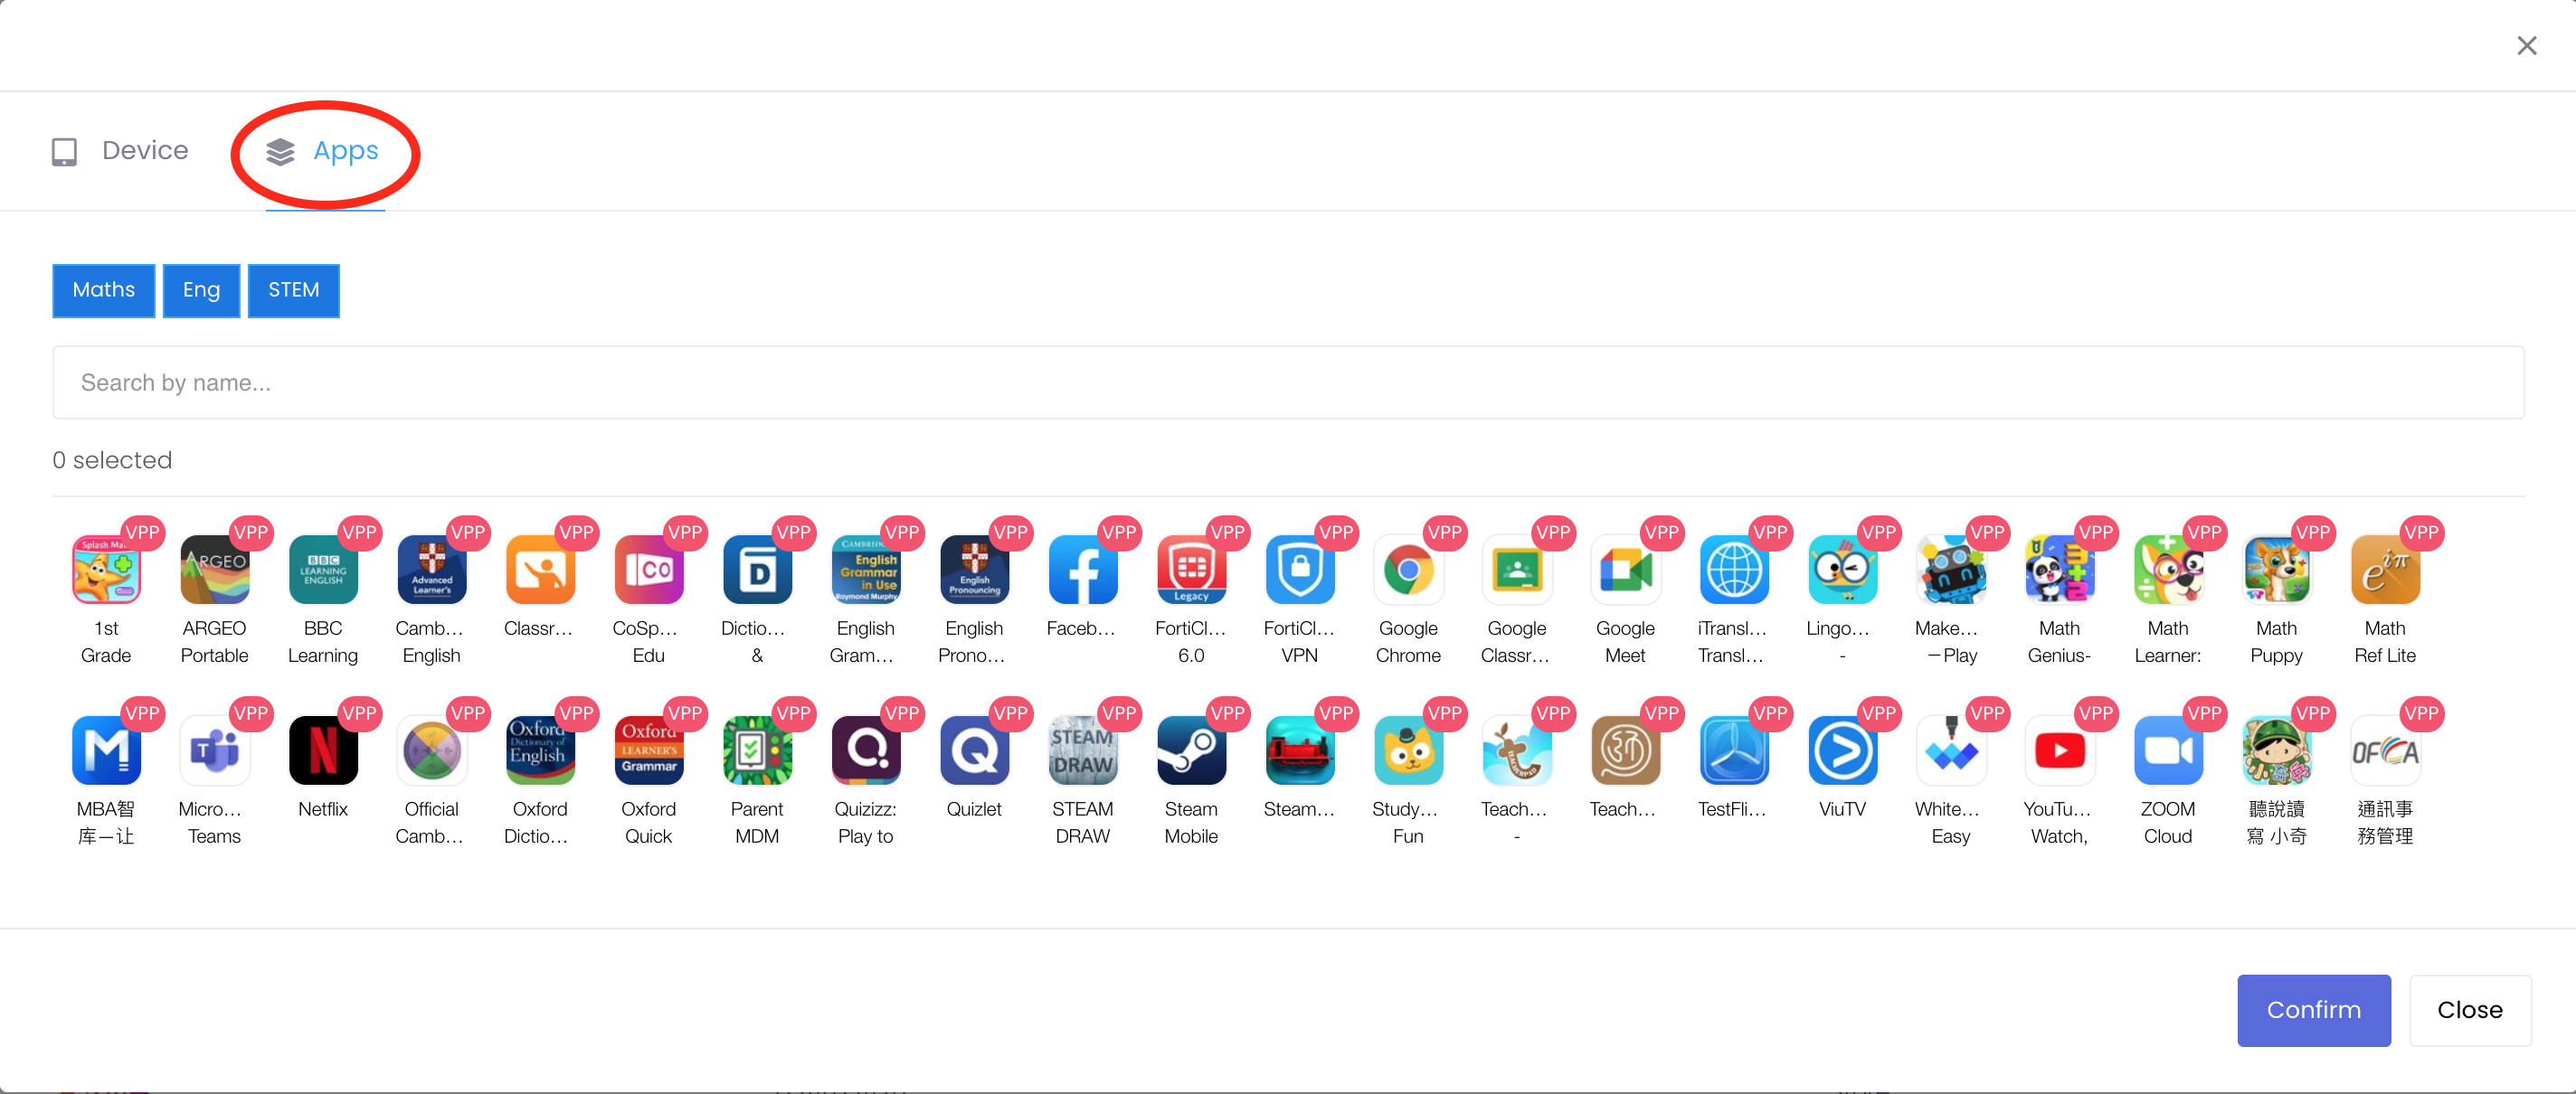
 2. Select Devices > Select Apps > Confirm
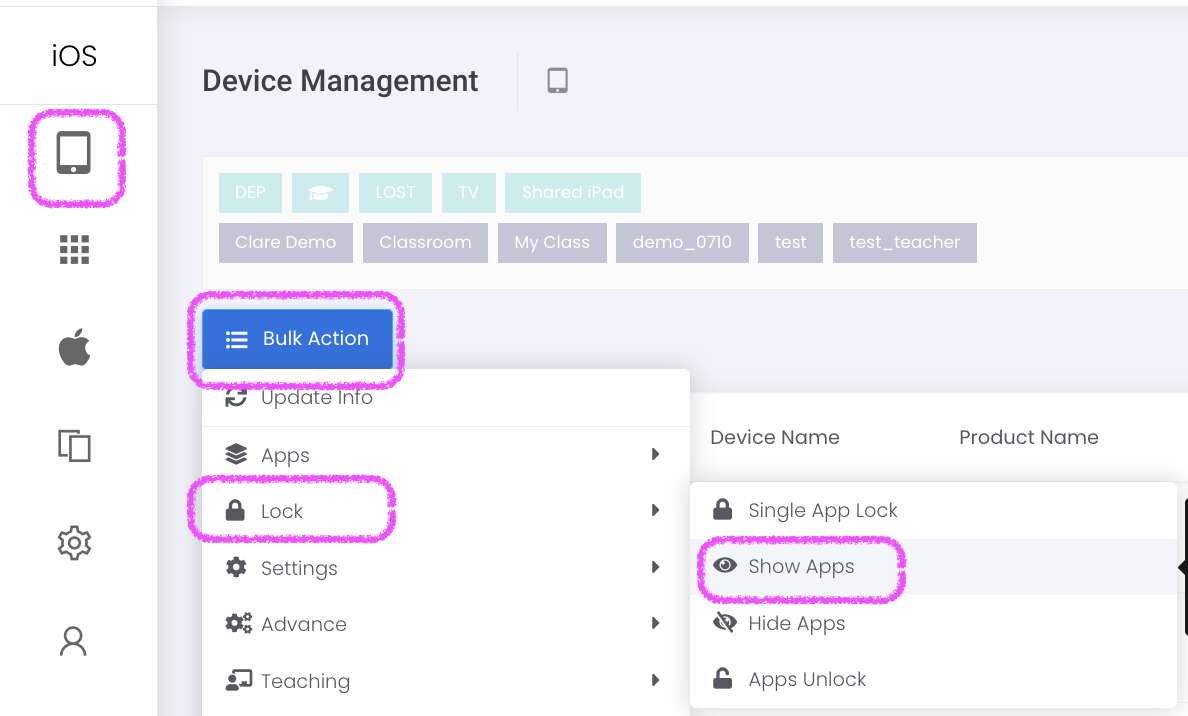
To release the lock, Device > Device Management > Bulk Action > Lock > Apps Unlock > Select Devices > Confirm
2. Select Devices > Select Apps > Confirm
To release the lock, Device > Device Management > Bulk Action > Lock > Apps Unlock > Select Devices > Confirm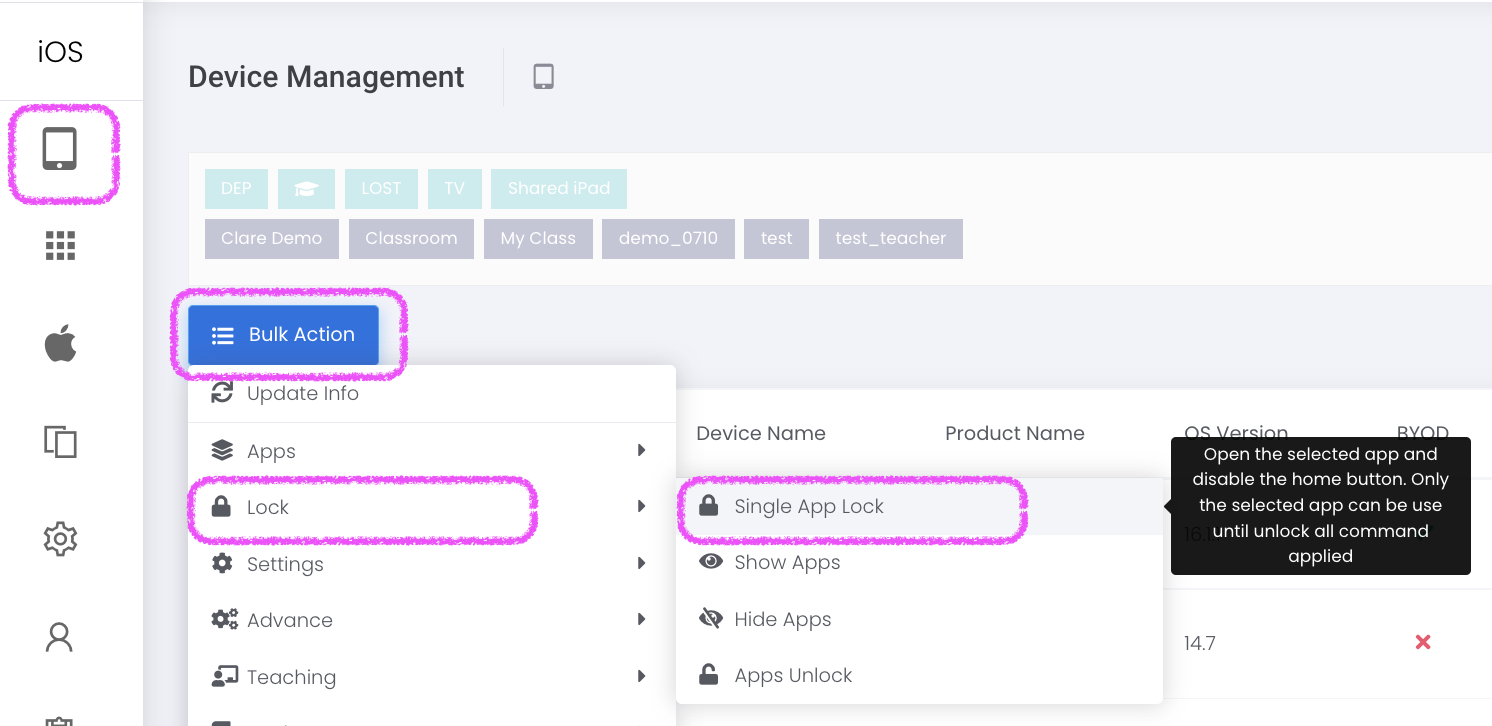 2. Select Devices > Select App > Confirm
To release the lock, Device > Device Management > Bulk Action > Lock > Apps Unlock > Select Devices > Confirm
2. Select Devices > Select App > Confirm
To release the lock, Device > Device Management > Bulk Action > Lock > Apps Unlock > Select Devices > Confirm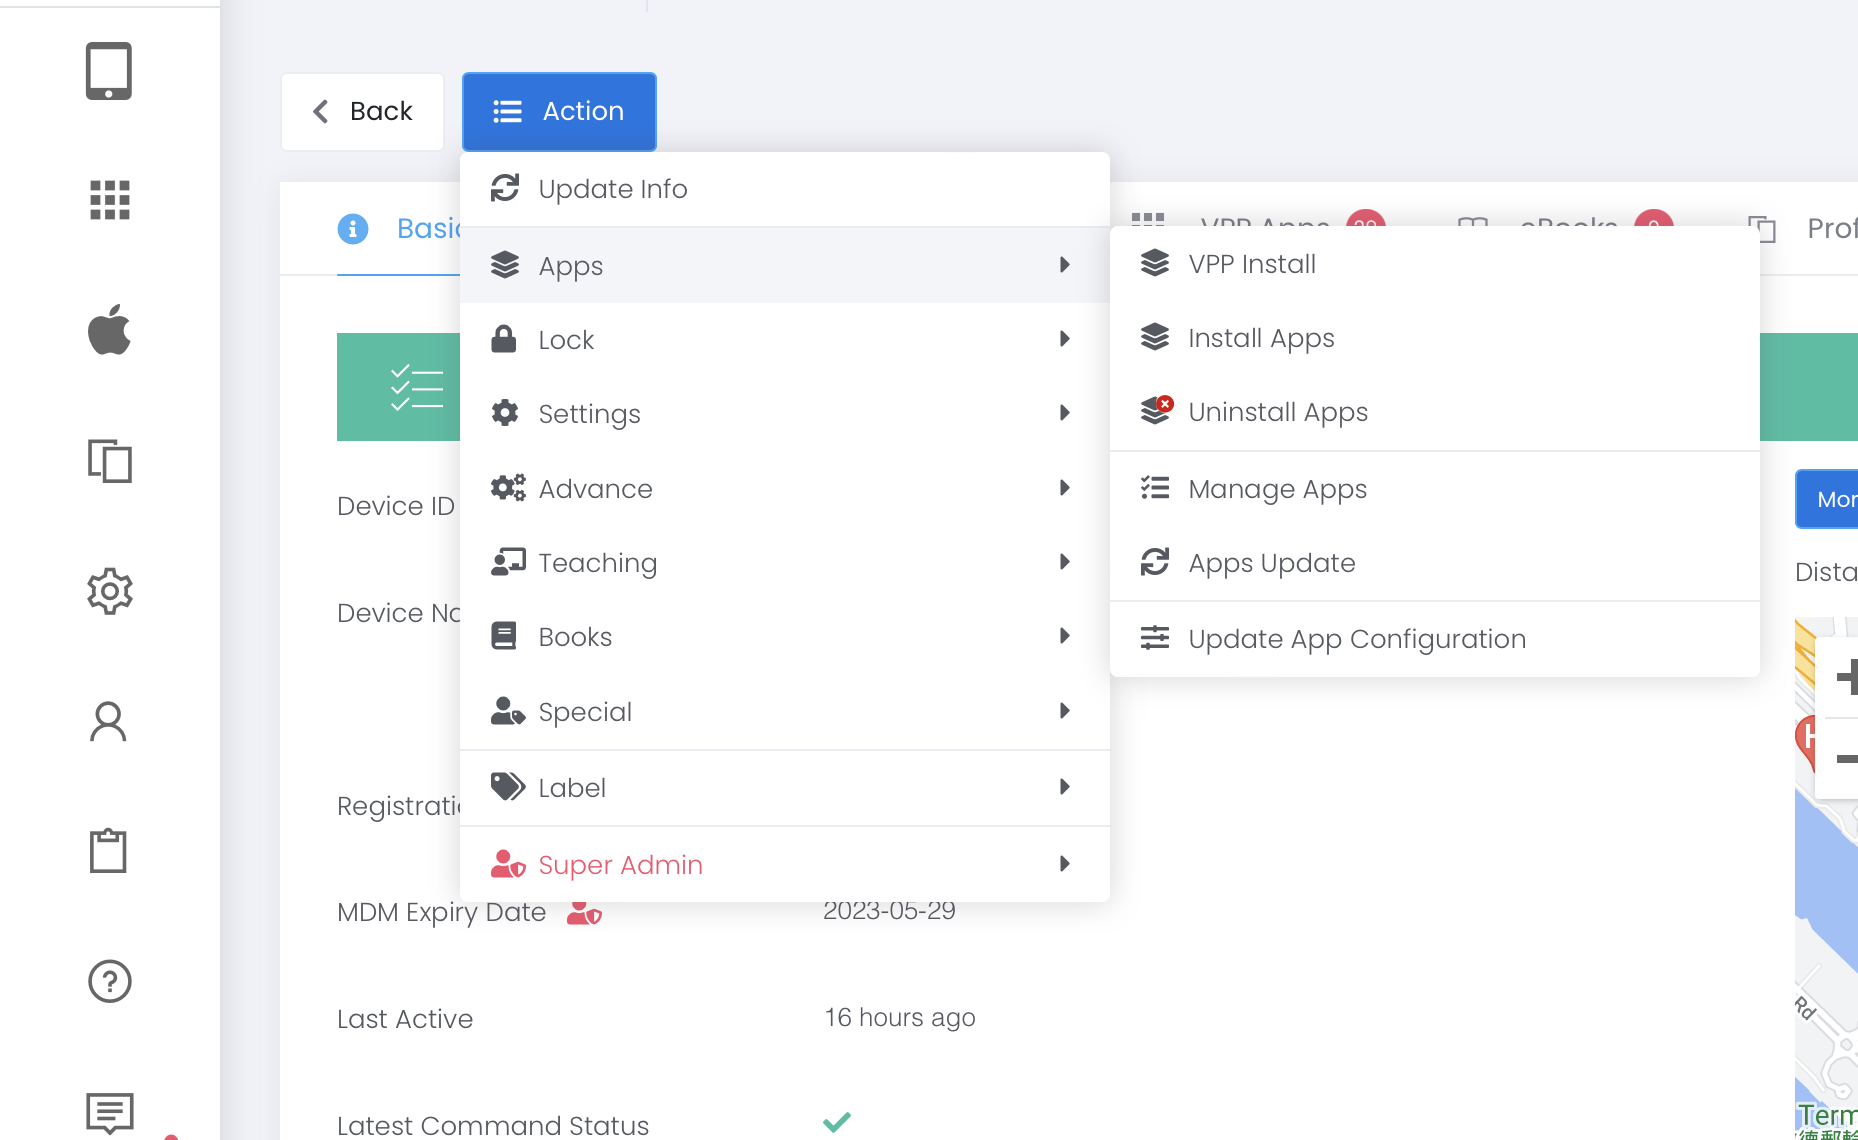 2. Install Apps: Action > Apps > Install Apps
Install non- VPP AppStore App or Adhoc (Enterprise) App. It may prompt the iPad user for Apple ID password if the device doesn’t carry a license for the required apps.
3. Uninstall Apps: Action > Apps > Uninstall Apps
Unisatll app. This command can’t apply to unmanaged apps. For unmanaged apps, please use the ‘Manage Apps’ command FIRST.
If more than one devices, please use “Bluk Action” command for installation.
2. Install Apps: Action > Apps > Install Apps
Install non- VPP AppStore App or Adhoc (Enterprise) App. It may prompt the iPad user for Apple ID password if the device doesn’t carry a license for the required apps.
3. Uninstall Apps: Action > Apps > Uninstall Apps
Unisatll app. This command can’t apply to unmanaged apps. For unmanaged apps, please use the ‘Manage Apps’ command FIRST.
If more than one devices, please use “Bluk Action” command for installation.
- First create a profile with web clip :
- Go to Profile > Create New > Web Clip
- Provide Profile Name, and tab + New Configuration button
- Select Web Clip from the drop-down
- Provide Label, URL and Icon Image
- Tab Save button


- Then, push onto target devices :
- Select target group of devices in device management Devices > Device Management
- Bulk Actions > Settings > Install Profiles
- Confirm the group of devices
- Manually remove from the iPad.
- Purchase those Apple Native Apps from Apple School Manager with your VPP Account.
- Sync VPP App in ESP Admin Console.
- Install VPP App onto iPad.
For other Apps, go to “Device” > “Device Management” > “Bulk Action” > “Apps” > “Manage Apps” > Select Device(s) > Select App(s) > “Confirm”.
- Create an App Label and set apps into the label
- In the “App Label” page, click “⋯ Action” next to the App Label
- Choose Set School App Store
- Select Device Label(s) and click Confirm to proceed
- Tab eSchoolPad icon
- A Number will appear on eSchoolPad‘s right top corner
- Tab eSchoolPad logo
- A page pops up
- Tab Apps at the bottom to open Apps page
- Tab VPP INSTALL in the “⋯ Action” column
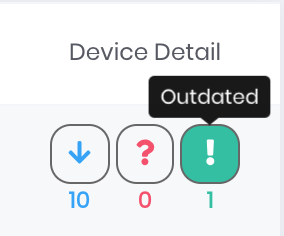
- In Admin Console, go to App > App Management
- Check the far right column, and note the Outdated indicator
- Tap Outdated icon
and a screen pops up
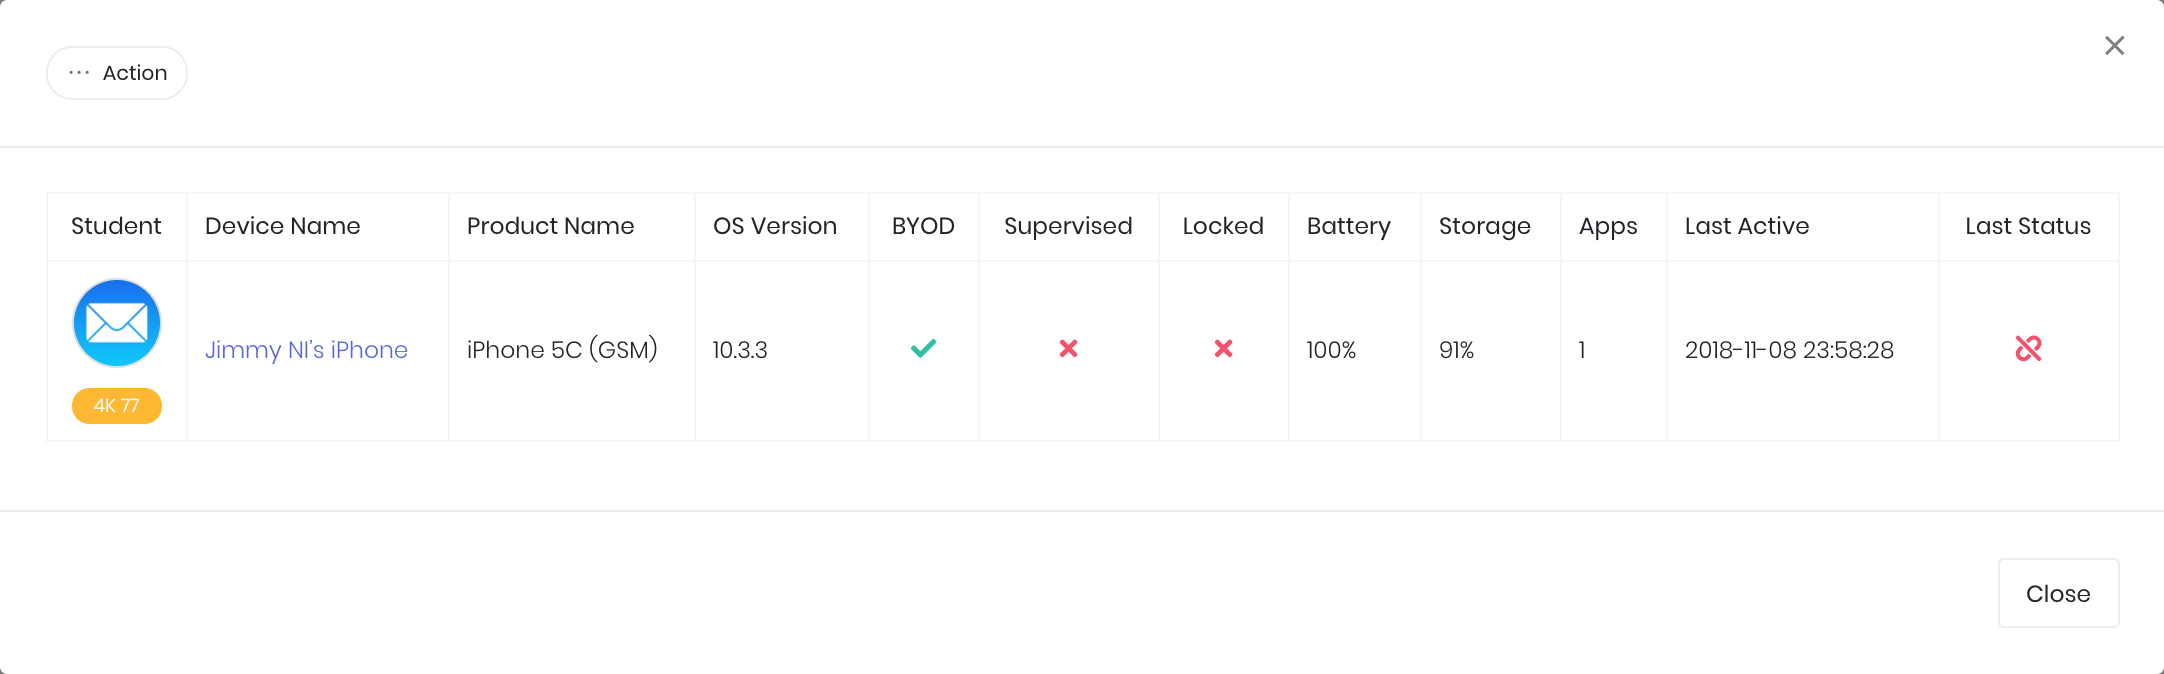
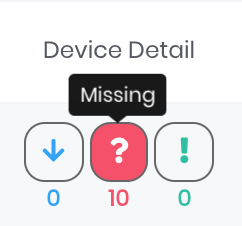
- Also, if Missing indicator is non-zero, tap Missing icon to check the devices list
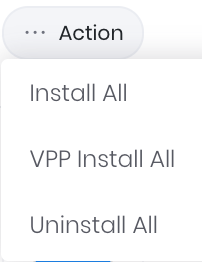
Update App
- Tap “⋯ Action” button on the top left corner
- Select VPP Install All if the app was initially VPP installed, otherwise select Install All
In Admin Console, go to Devices > Device Management > Select the devices you want to push the apps to
Normal Install
- Go to “Device” > “Device Management”
- If just need to install on 1 single device, find the device row, tab … Actions button on the left
- Select “Apps” > “Install Apps” from the flyout menu
- Select the app(s) you want to install
- Tab “Confirm” button to proceed
- If you want to install on a group of devices, tab “Search” button on the top right corner
- Select a device label or multiple device labels, and tab “Search” button at the bottom
- The selected labels will be extracted in the list
- Tab Bulk Actions button, select “Apps” > “Install Apps” from the flyout menu
- Select all the devices you want, and the app(s) you want to install
- Tab “Confirm” button to proceed
VPP Install
Repeat the above steps, except Step 9 select “Apps” > “VPP Install” instead from the flyout menu
App label is a grouping of apps
With App labels, you can easily deploy Apps in folders upon device enrolment, and teachers can lock multiple apps in a folder
In Admin Console, go to “App” > “App Label …”
Create App Label
- Tab + Create New button
- Type a label name
- Select a type
- “Public” – Those apps are available to all teachers and TSSs
- “Personal” – Those apps are for only 1 person, select a person in Belong To
- “Group” – Those apps are for a group of users, select a group in Belong To
Set Apps to App Label
- After creating an App Label, tap … Action button in the App Labels list
- Select Set Apps in the dropdown list
- Select the Apps you want to include
- Tap Confirm to save the setting
ESP supports more than 1 VPP account. That is you can use multiple Apple ID accounts to purchase VPP Apps in ASM, provided these accounts are under 1 single school.
Please follow the steps below to add VPP Accounts :
Download Token from ASM
- Access school.apple.com with the new Apple ID
- Go to VPP and download token and save onto your PC/Mac machine. (the file should be with .vpptoken as an extension)
Upload Token to ESP
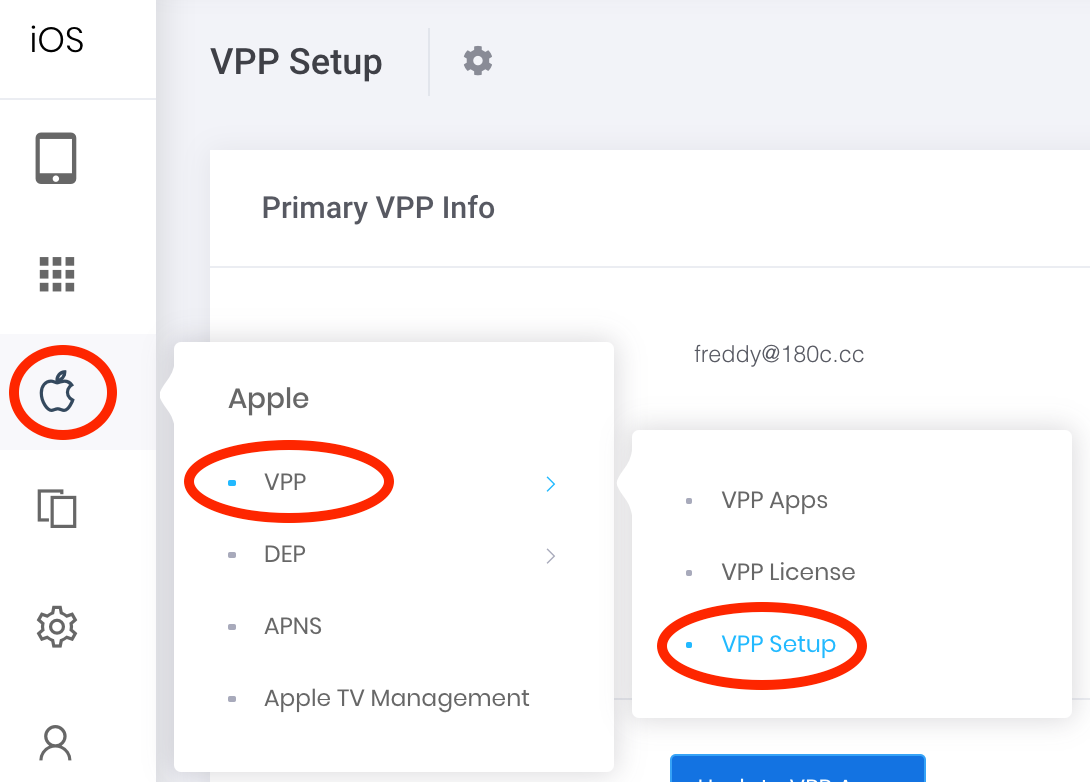
- Go to “Apple” > “VPP” > “VPP Setup”
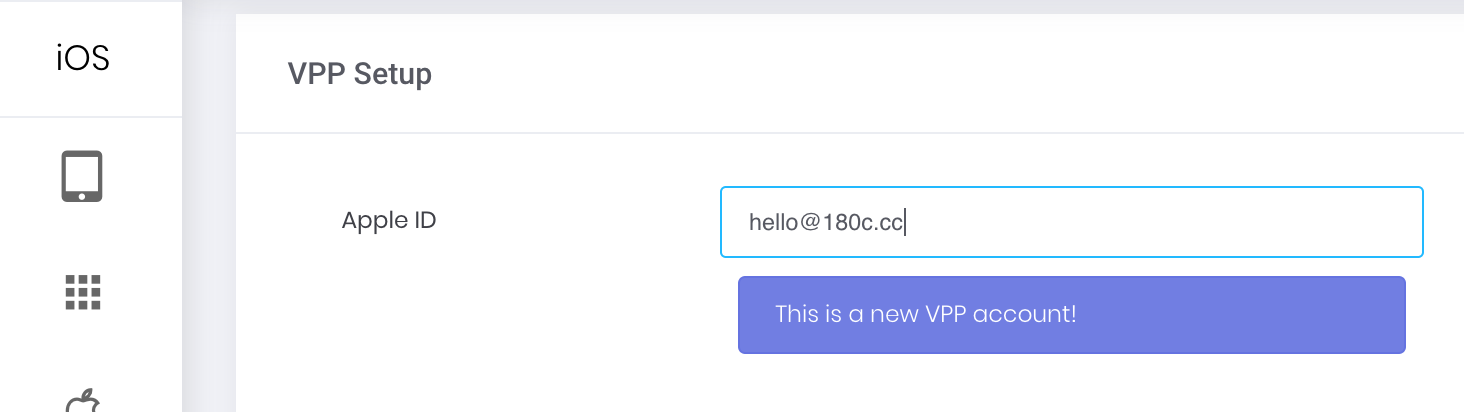
- Type a new Apple ID used for purchasing VPP Apps, and tab “Browse” button
- Upload the .vpptoken file which you have downloaded in Step 2 above
- Tap “Save”
- The newly added VPP account will be added in VPP Accounts section above
There are 2 possibilities :
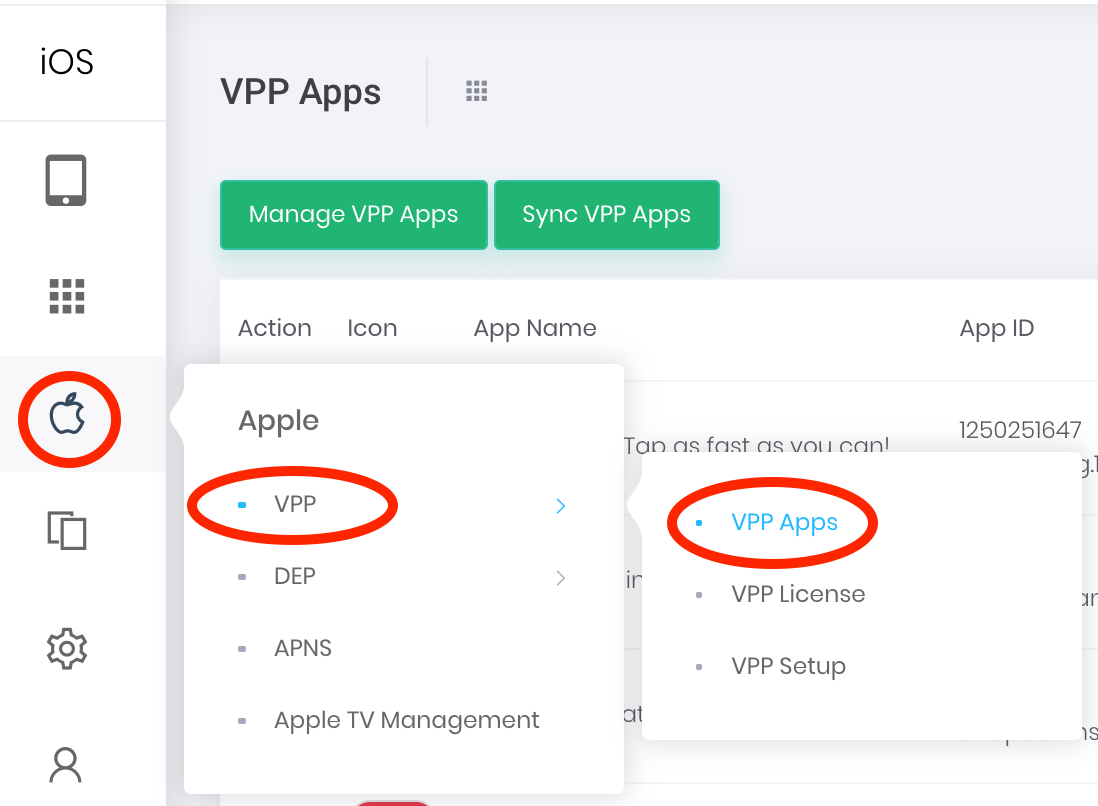
- Sync VPP Apps
- Go to “Apple” > “VPP” > “VPP” Apps > tab “Sync VPP Apps” button
- Our system will instantaneously call Apple’s VPP Server and ask for the latest update
- Incorrect VPP Account
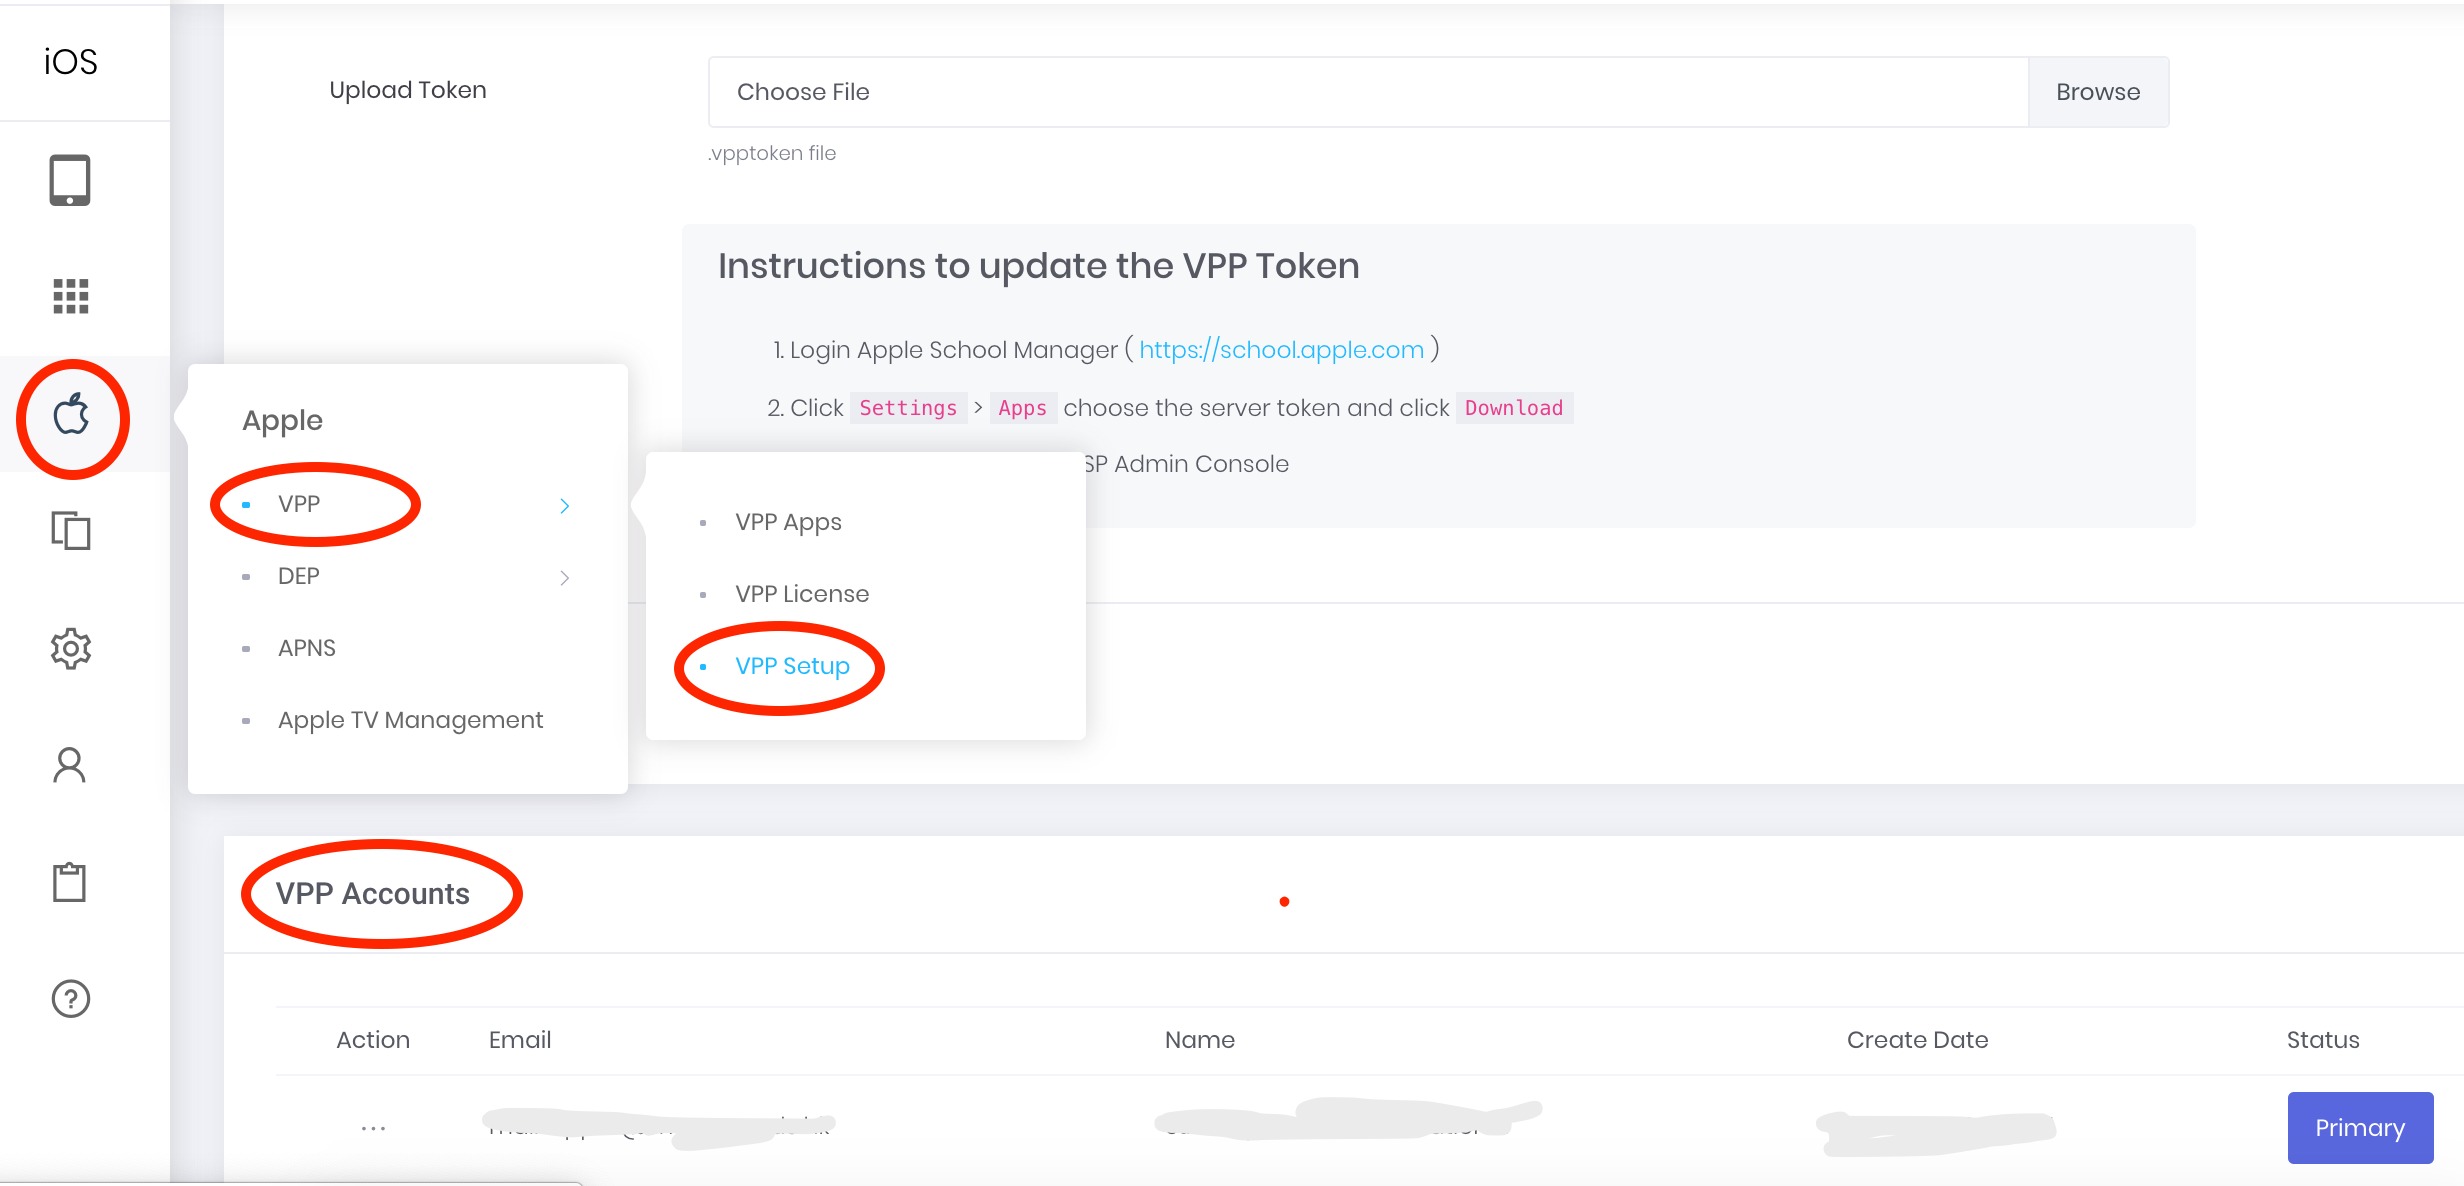
- Go to“Apple” > “VPP” > “VPP Setup”
- Check if the account used for purchase is in the VPP Account list. If not, please add, or use the account listed to purchase in ASM again
TeacherPad+ 1.3.1
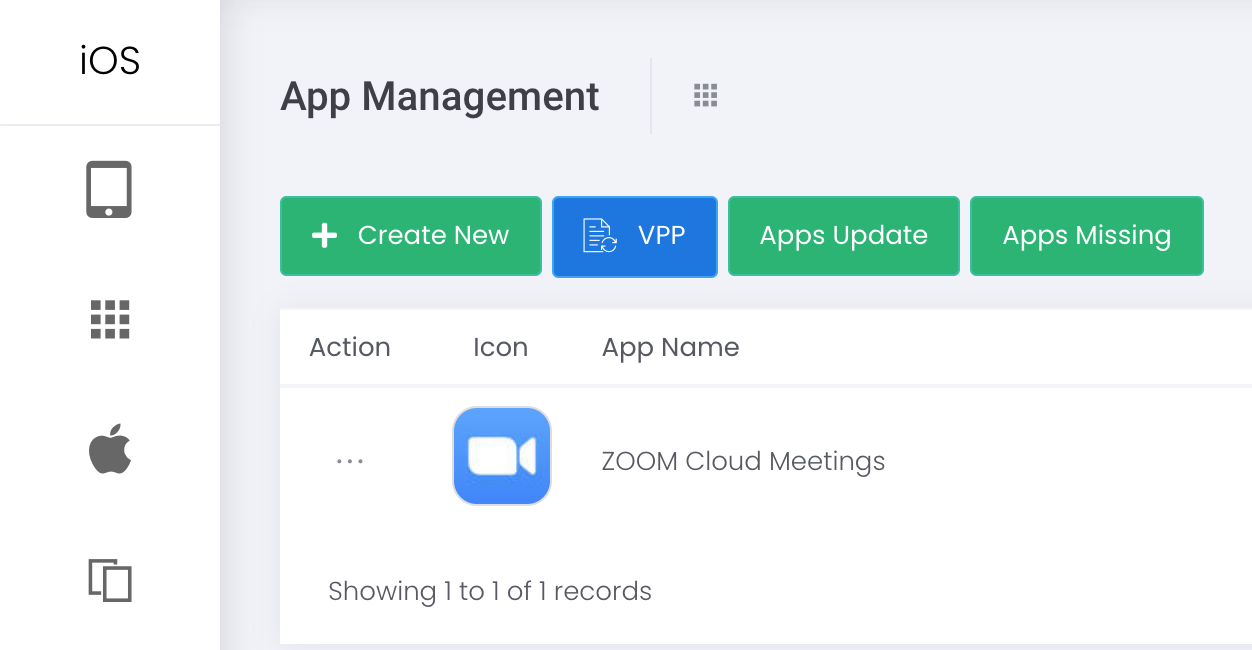
You can restrict users from logging into ZOOM to enter a meeting, and users can only enter meeting room with Meeting ID and passcode.
- Go to “App” > “App Management” > Search ZOOM Cloud Meetings
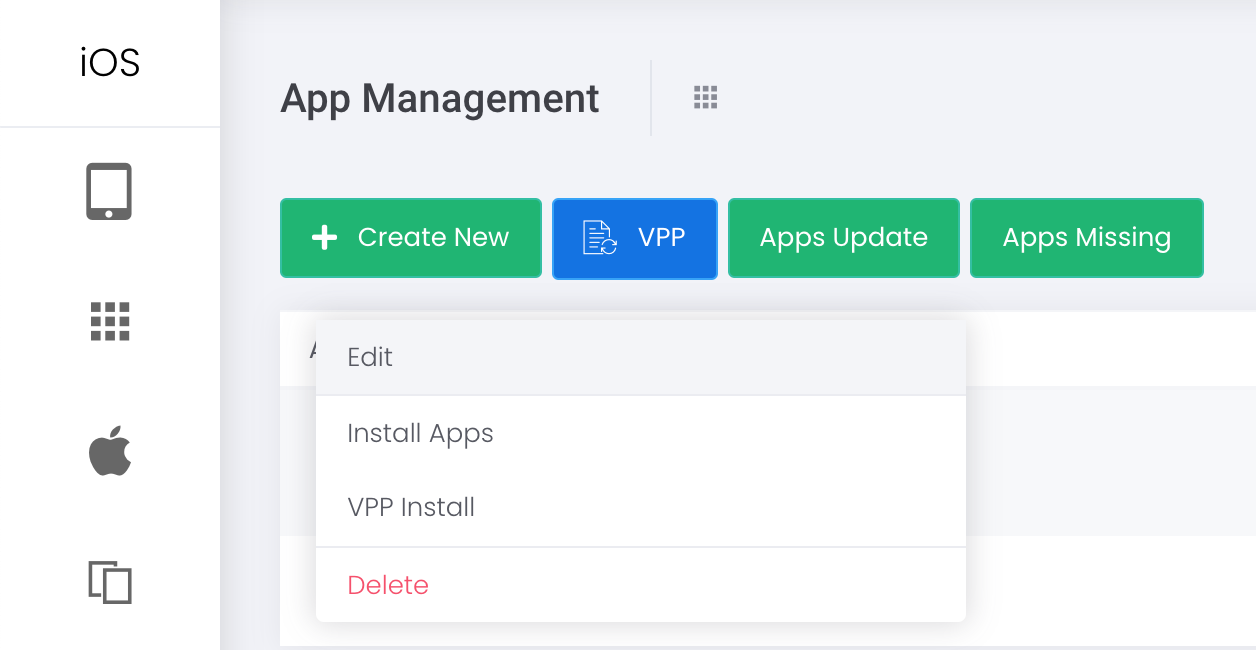
- “Action” > “Edit”
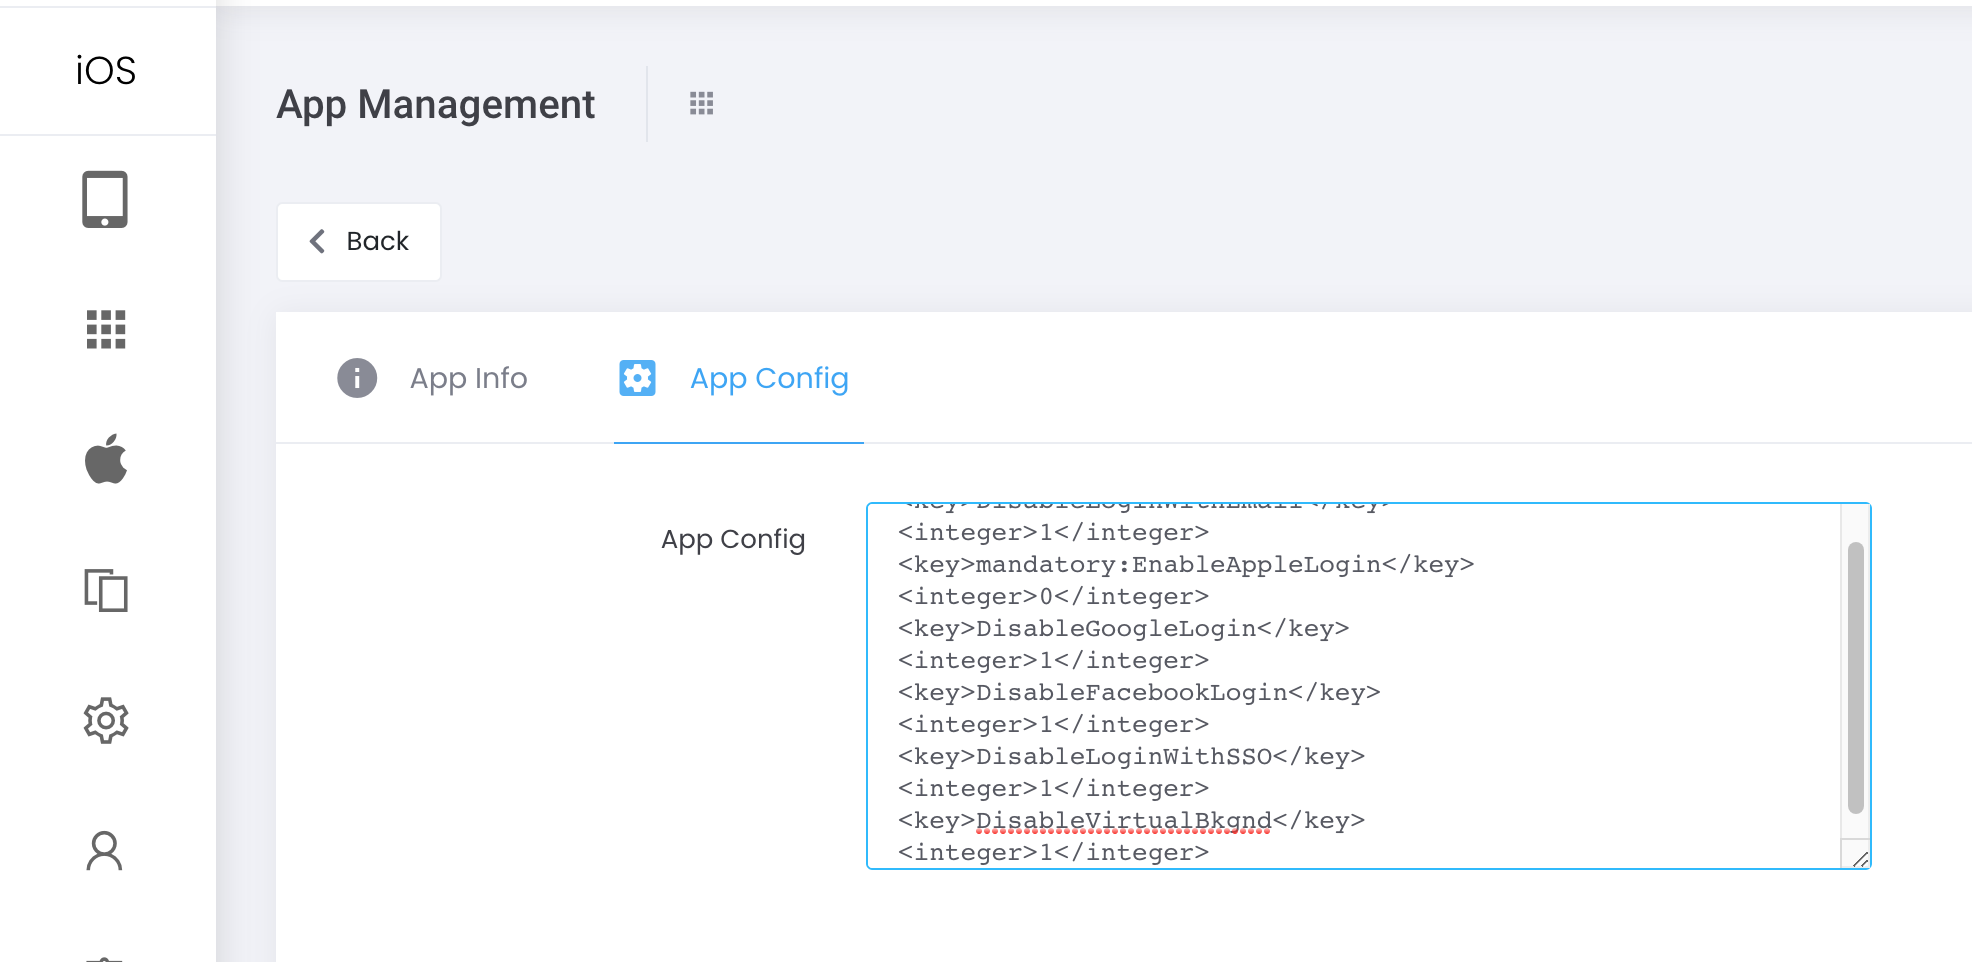
- Tap “App Config”, copy and paste the following scripts into the App Config box.
Reference:https://support.zoom.us/hc/en-us/articles/360022302612-Using-MDM-to-configure-Zoom-on-iOS
Tap “SAVE”. - Go to “Device” > “Device Management” > “Bulk Action” > “App” > “VPP Install” > ZOOM Cloud Meetings (*You have to re-install the app even if you have already installed before)
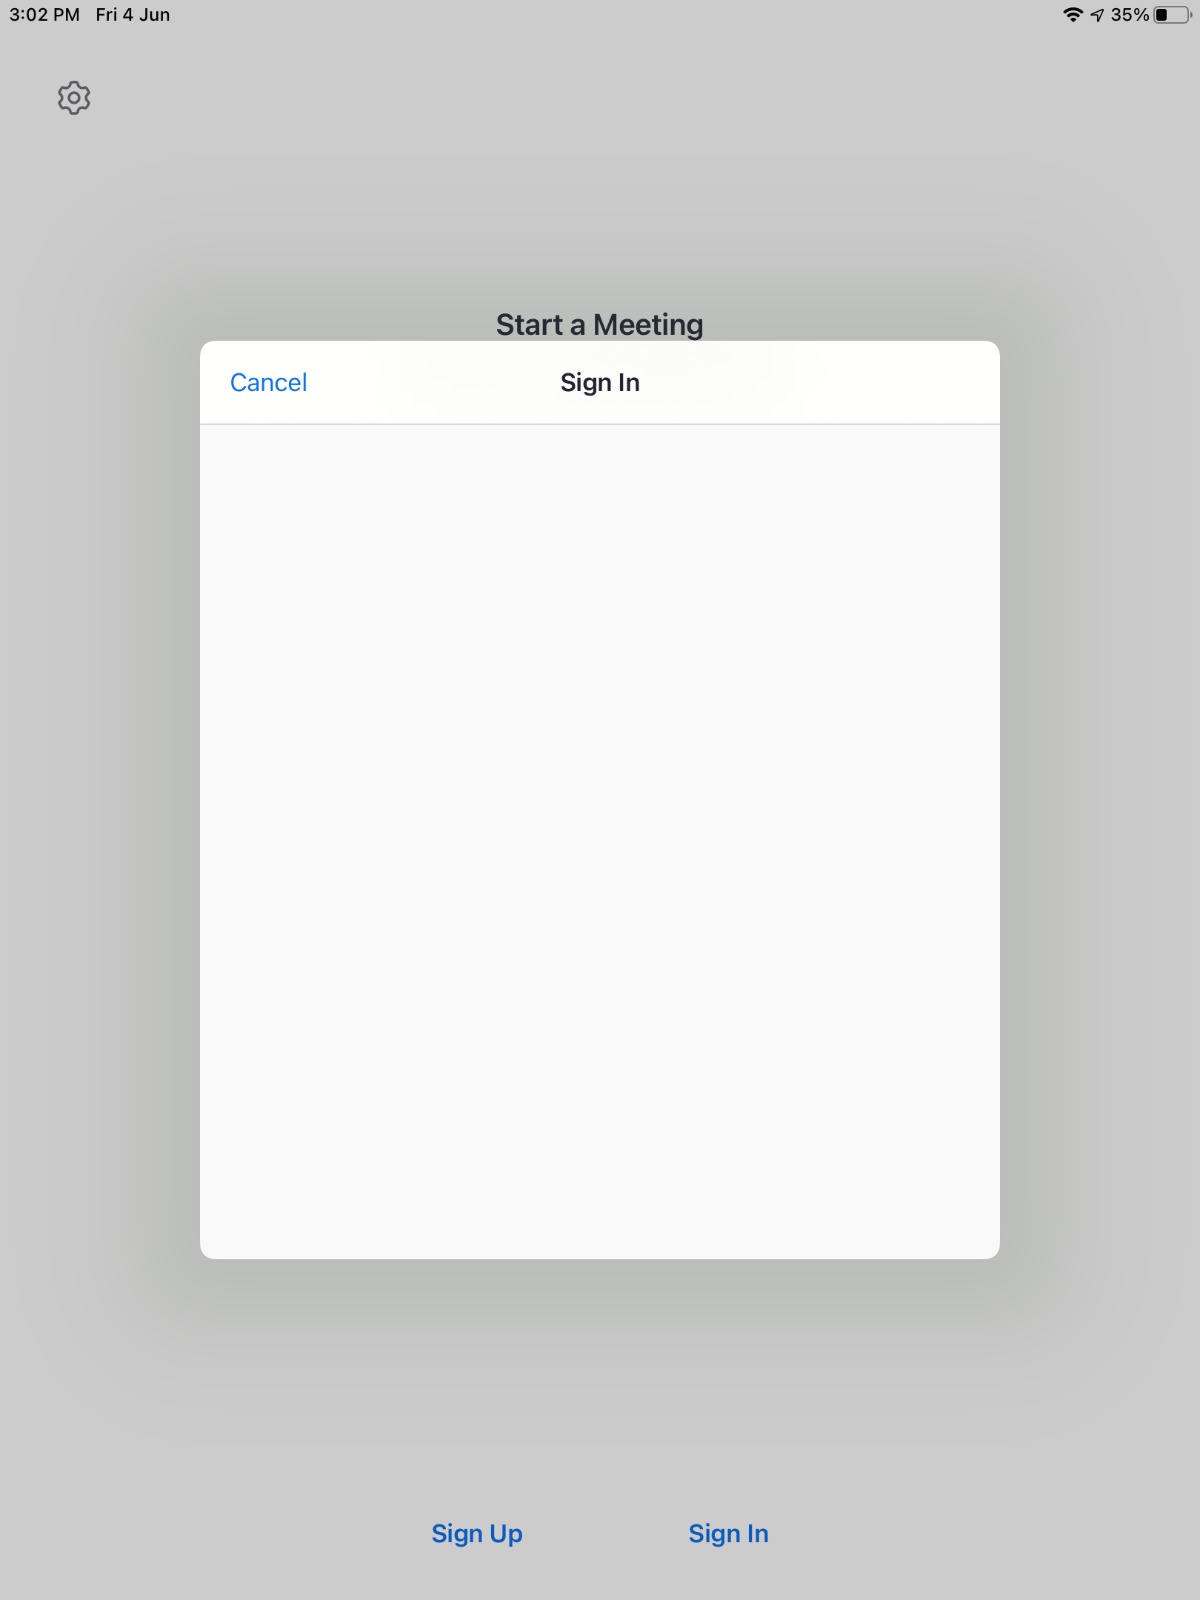
- When users enter “ZOOM” app in the iPad, “Sign In” still appears but login page will be inactive as below:
Credit to: CNEC TA TUNG SCHOOL Tang Sir
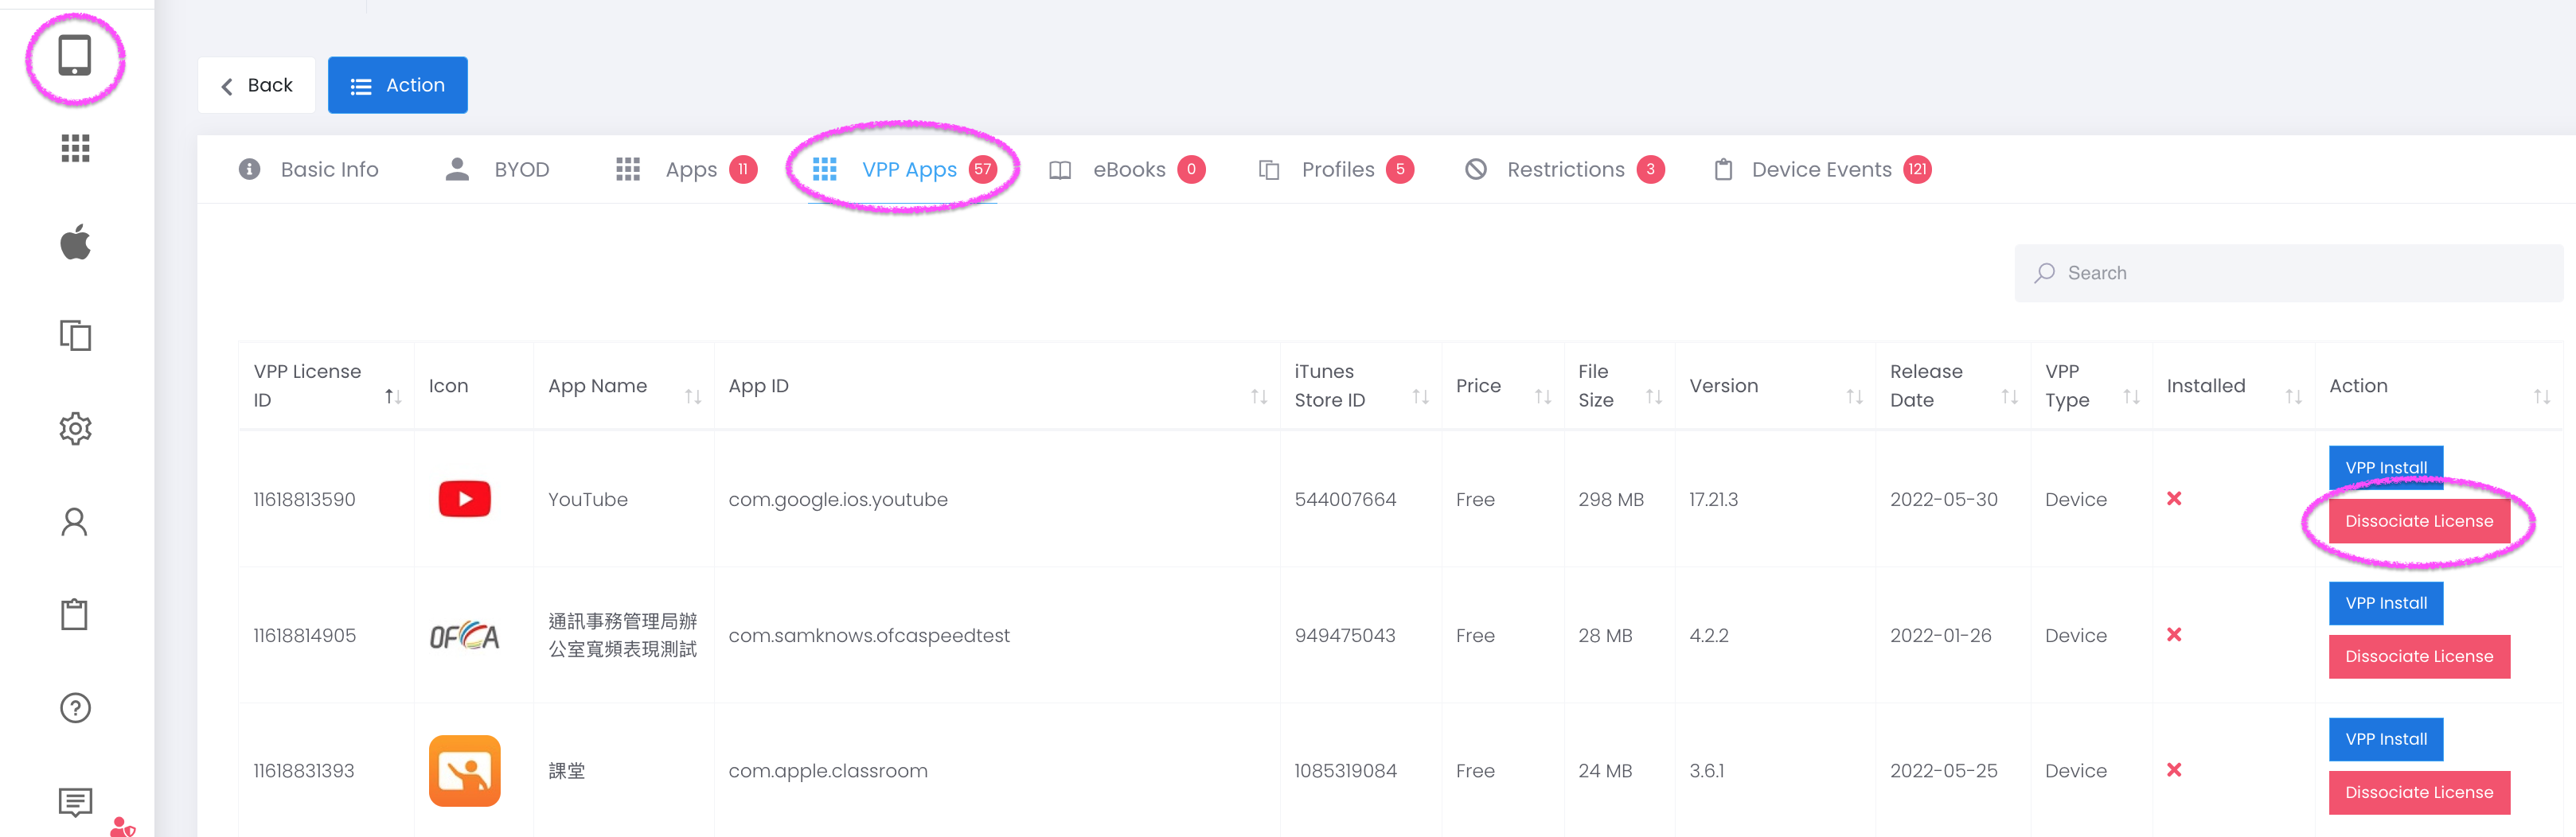
ESP allows you to assign multiple VPP App licenses to multiple devices.
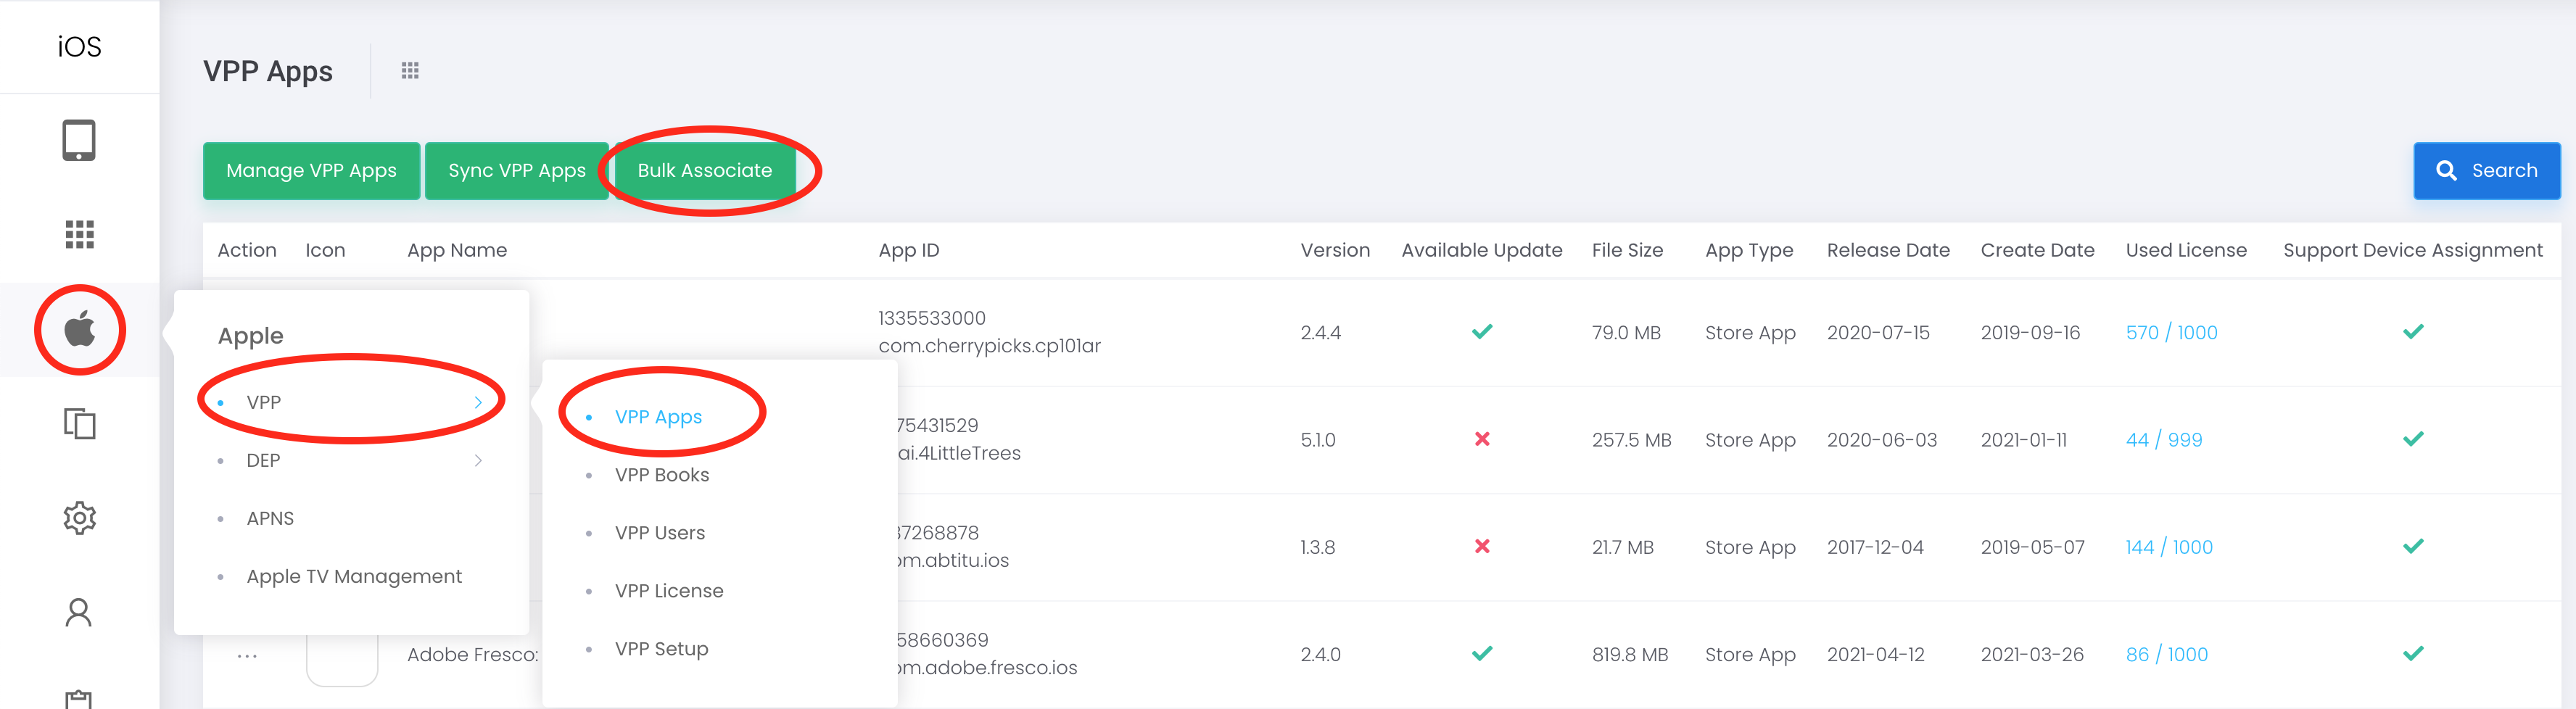
- “Apple” > “VPP” > “VPP License” > “Bulk Associate”
- Select “Devices”
- Select “VPP Apps” and tap “Confirm”
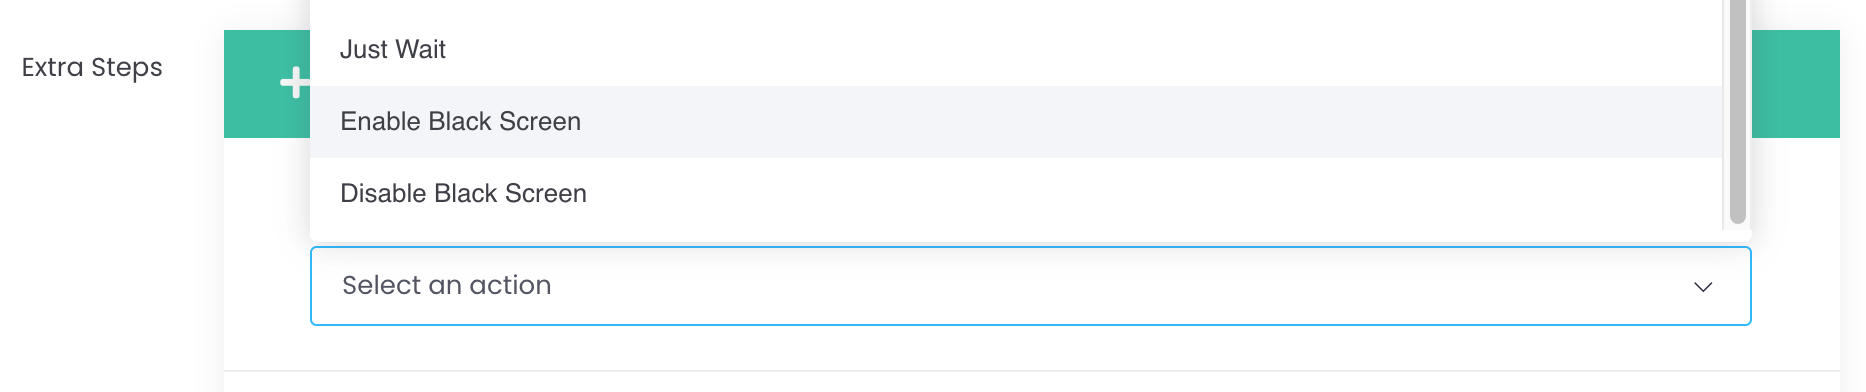
You can now set a schedule to enable and disable BlackScreen. Simply find the optional “Enable Black Screen” and “Disable Black Screen” in Extra Step in Schedule.
Application:You may consider using this feature as Sleeping mode at night time for BYOD students.
Note:This feature is similar to Single App Lock to ESP (Student), thus involve battery consumption. Recommend connecting to power source while in use of Blackscreen with Schedule.